Smart Tasks & Forms in Kayse
A Simple Guide to Creating, Sending, and Tracking Tasks for Your Clients
Smart Tasks help you collect exactly what you need from clients in a clean, step-by-step way.
The easiest way to think about it is:
- A task is one question or one action.
- A form is a group of tasks.
- A page is one step inside the form.
You build the form, send it to the client, the client completes it, and Kayse stores the answers in the right places.
This article walks through the full flow from start to finish:
- Create the form with the AI Form Generator, from scratch, or from a template.
- Organize the form into pages and tasks.
- Choose task settings like input type, required or optional, and conditional logic.
- Map answers to Kayse custom fields and CRM fields.
- Send the form to the client.
- Review submitted answers in the case, the form, and mapped fields.
If you need the import and CRM side explained in more detail, also see Mapping Tool and Task Mapping Guide.
📝 1. What Are Smart Tasks?
Smart Tasks are the individual items a client needs to complete.
Examples:
- answer a question
- choose from a list
- upload a file
- confirm something
Smart Tasks can live in two places:
- inside a Form, where several tasks are grouped together
- as a standalone task on a Case, when you only need one item
Clients can complete tasks through:
- secure web links
- the Mobile Client Portal App
- connected AI voice flows when a form is used in an AI workflow
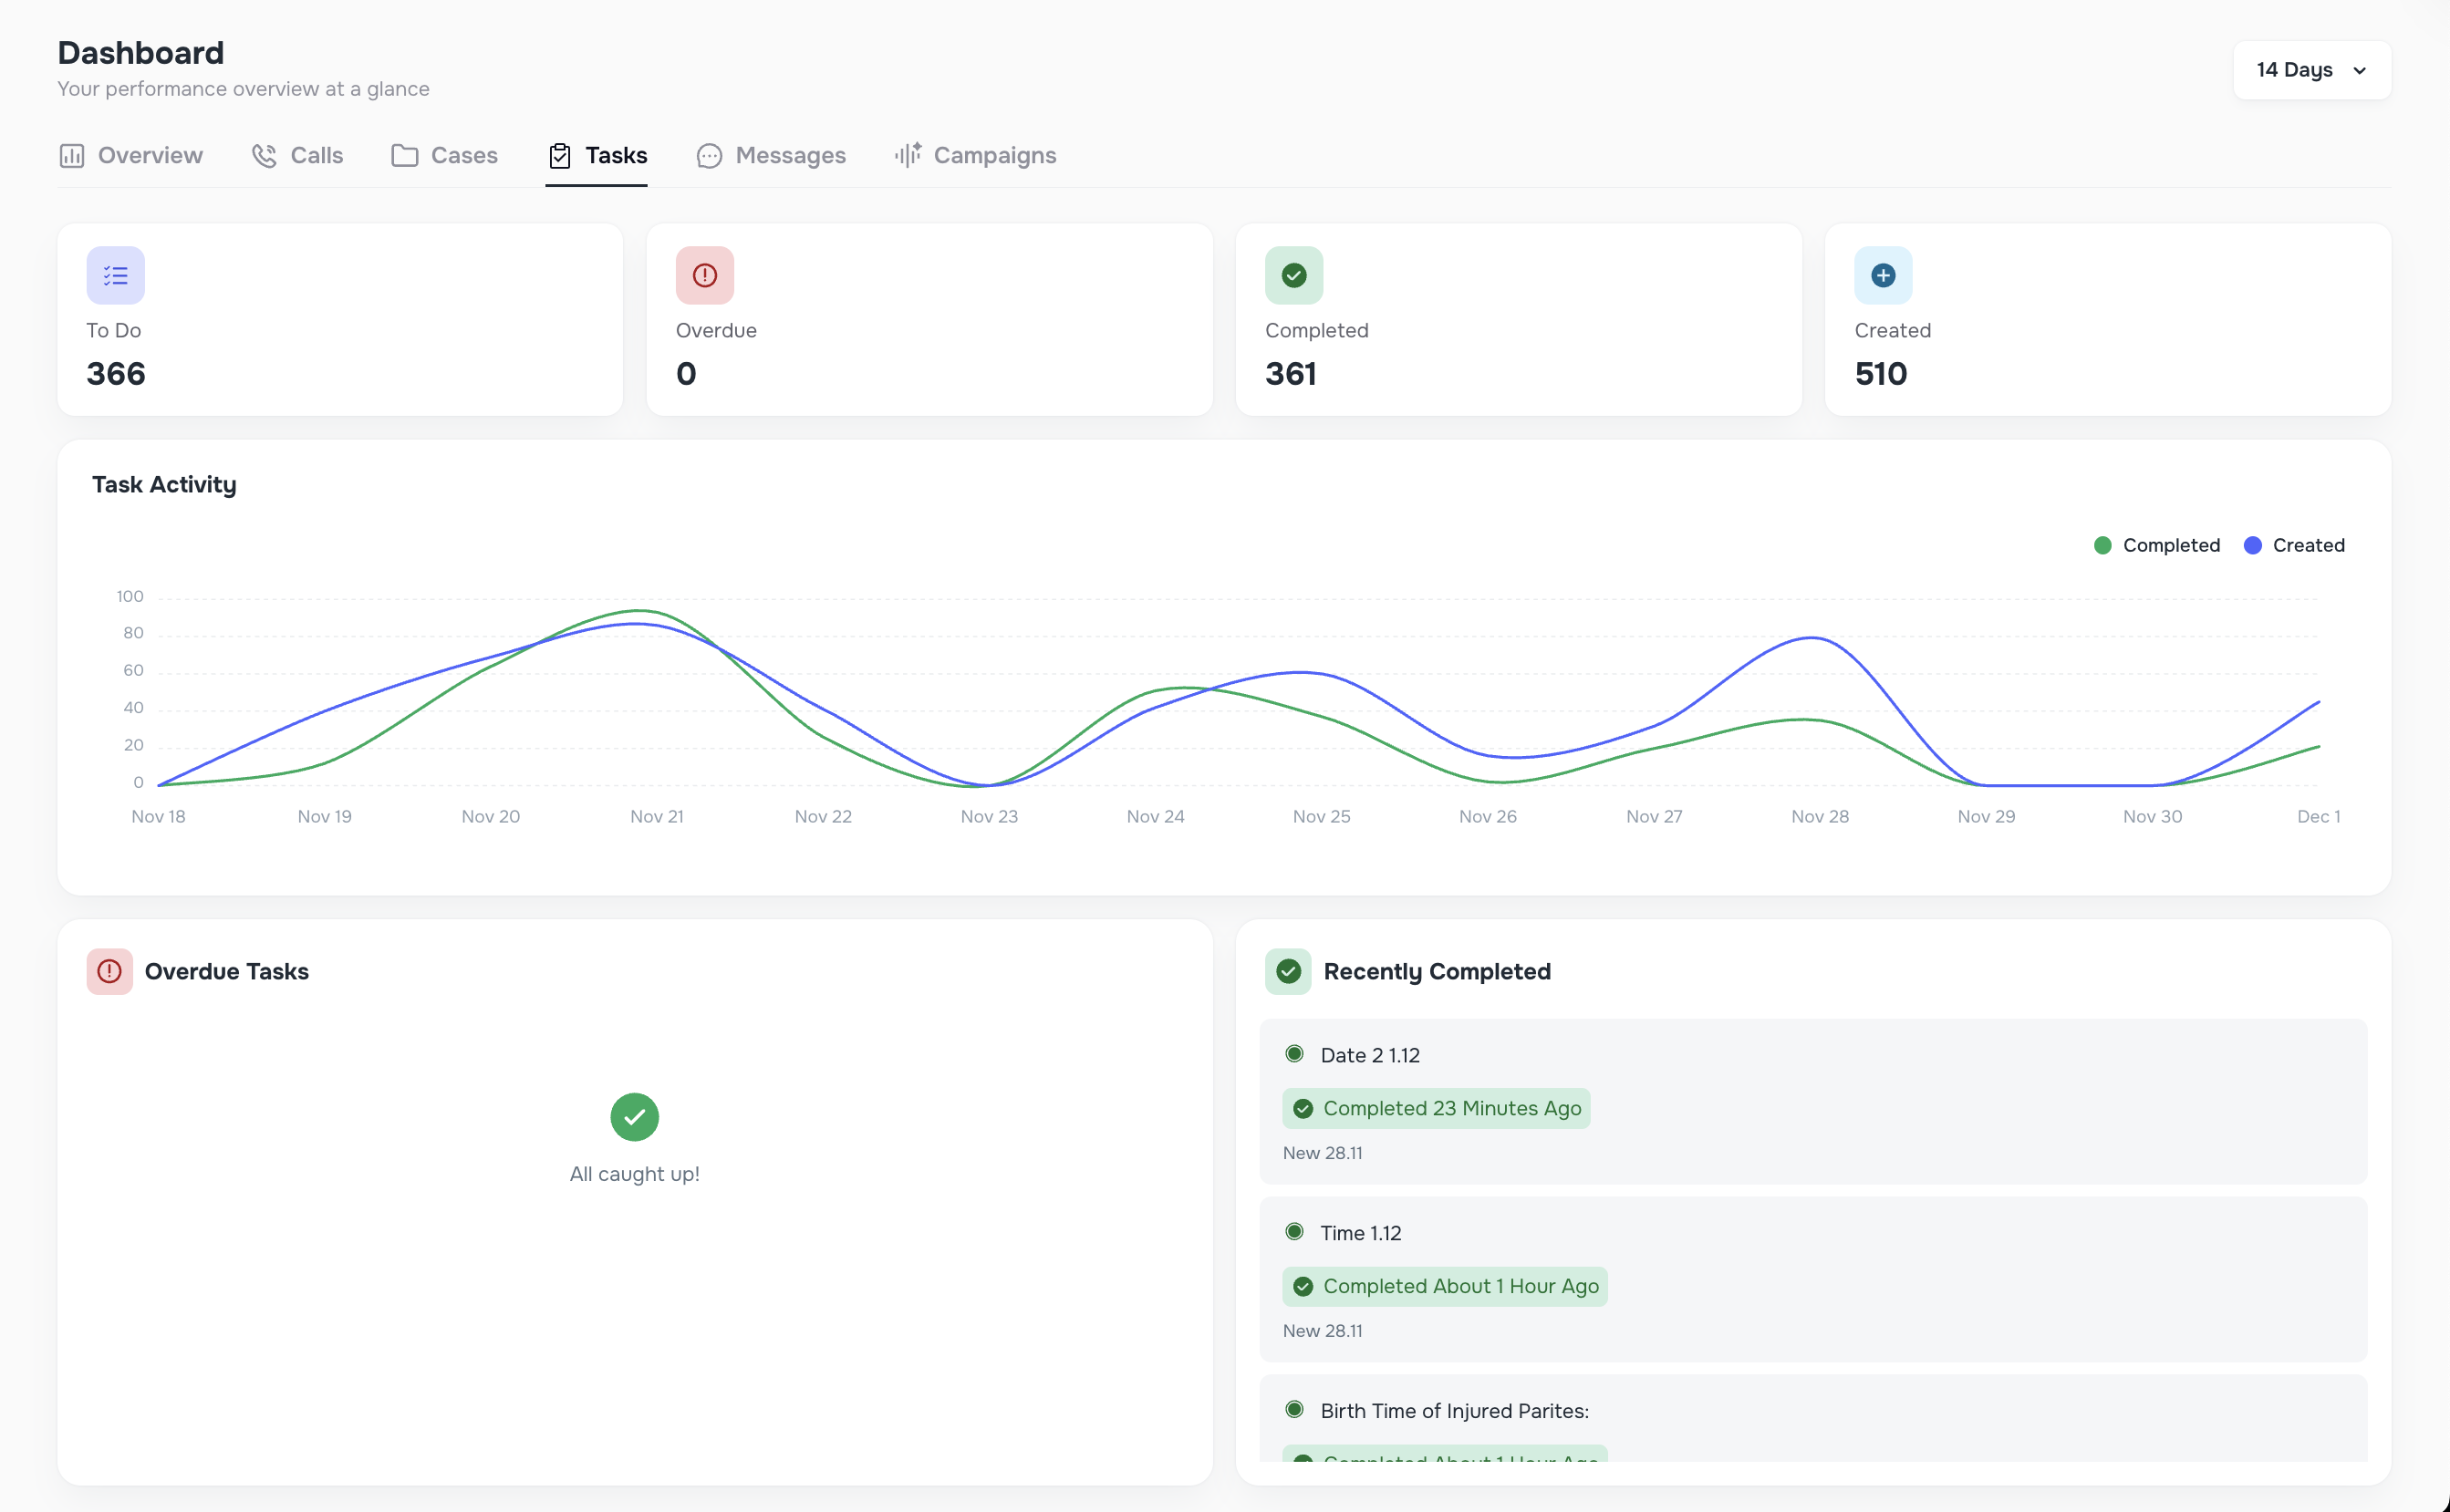
Smart Tasks give your team a simple status view, including:
- To-Do
- Completed
- Overdue
- Skipped when conditional logic hides a task
📍 2. How Forms Work
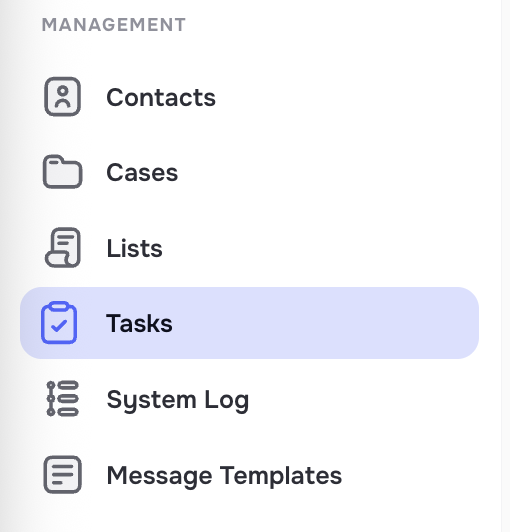
Go to the Tasks page in the left side bar menu and select a Form tab to access the following pages:

Forms, pages, and tasks
A form is the full package you send to the client.
A form contains:
- a form name and description for your team
- one or more pages
- one or more tasks on each page
Clients move through the form one page at a time, so long workflows feel smaller and easier to finish.
Where the form appears after it is used
A form appears inside a Case only after at least one task from that form is linked to that client.
Each Case then shows:
- tasks from forms
- standalone tasks
- status filters
- the submitted answers for that client
🧱 3. Full Setup Flow From Start to Finish
If you want the clearest setup order, use this checklist:
- Create the form with AI, from scratch, or from a template.
- Add pages to break the form into simple steps.
- Add tasks to each page.
- Choose each task's input type and settings.
- Add conditional logic if some questions should appear only in certain situations.
- Map answers to Kayse custom fields when the answers should also live on the case record.
- If CRM sync is needed, confirm the Kayse field is also mapped to the CRM field.
- Send the form to the client.
- Review answers inside the case, form, and mapped fields.
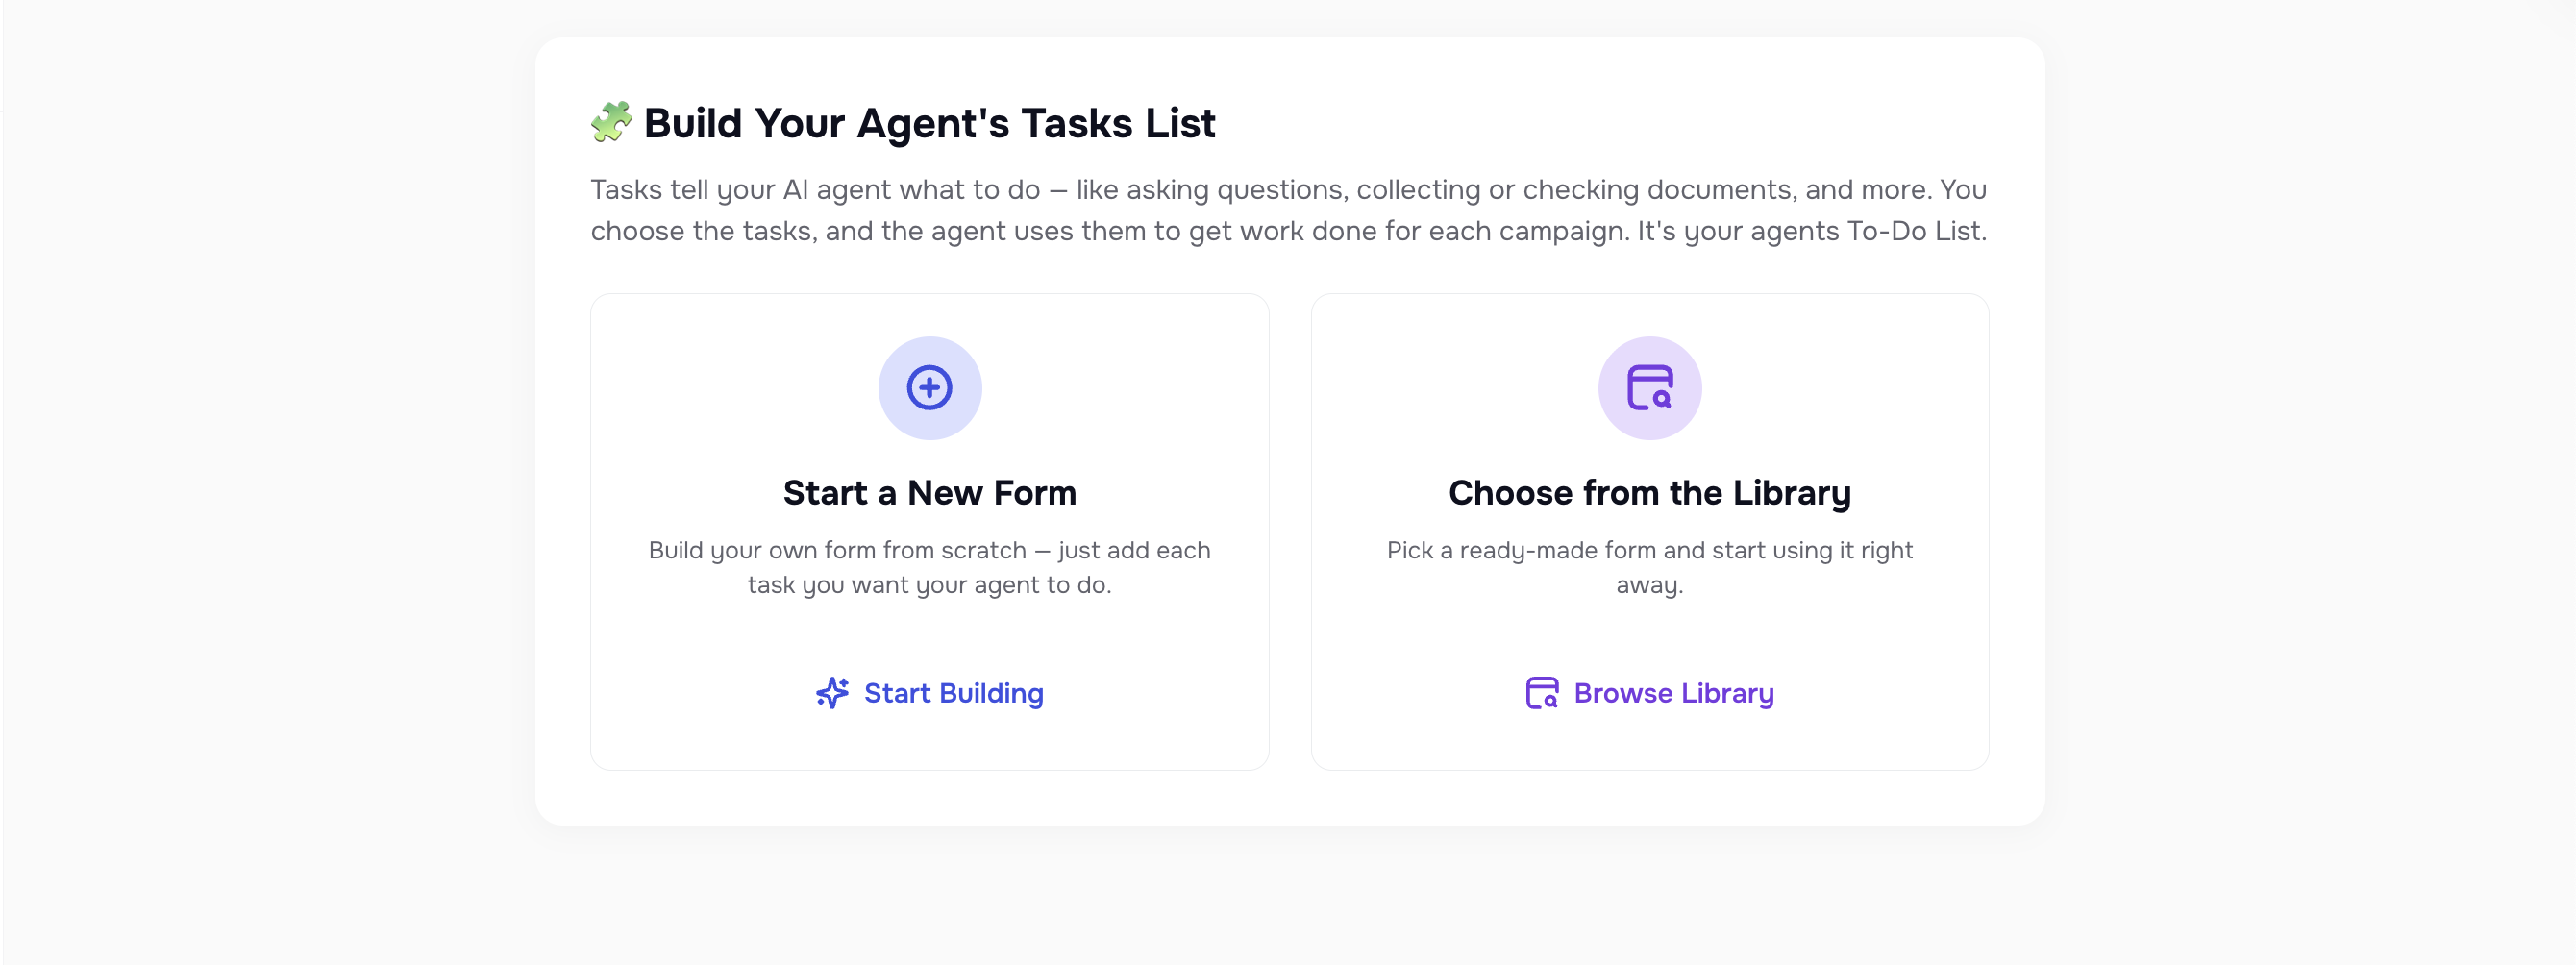
3.1 Start a New Form
You can create a form in three ways:
- Use the AI Form Generator to turn instructions or uploaded documents into a draft form.
- Create a form from scratch.
- Use a template from your library.
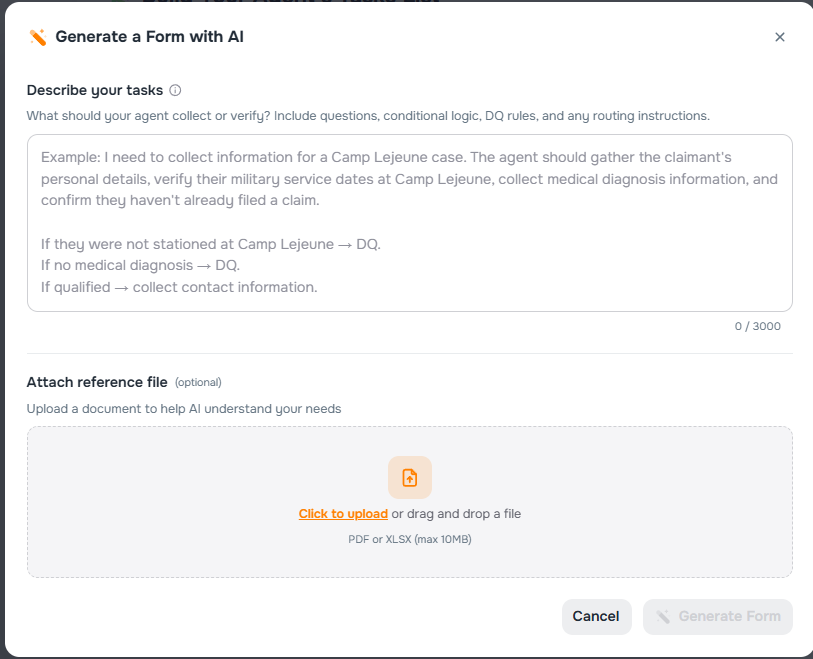
The AI Form Generator is the fastest starting point when you already have an intake script, questionnaire, call flow, or document.
The flow is simple:
- Open the AI Form Generator.
- Describe the form in plain English.
- Optionally upload a supporting document.
- Click Preview to generate draft pages and tasks.
- Adjust the prompt and preview again until it looks right.
- Approve the draft so Kayse creates the form.
When the draft is approved, Kayse opens the form so your team can review it, clean it up, and finish setup.
You can start the AI Form Generator from form creation and from the AI Campaign form step when a campaign needs a new intake form.
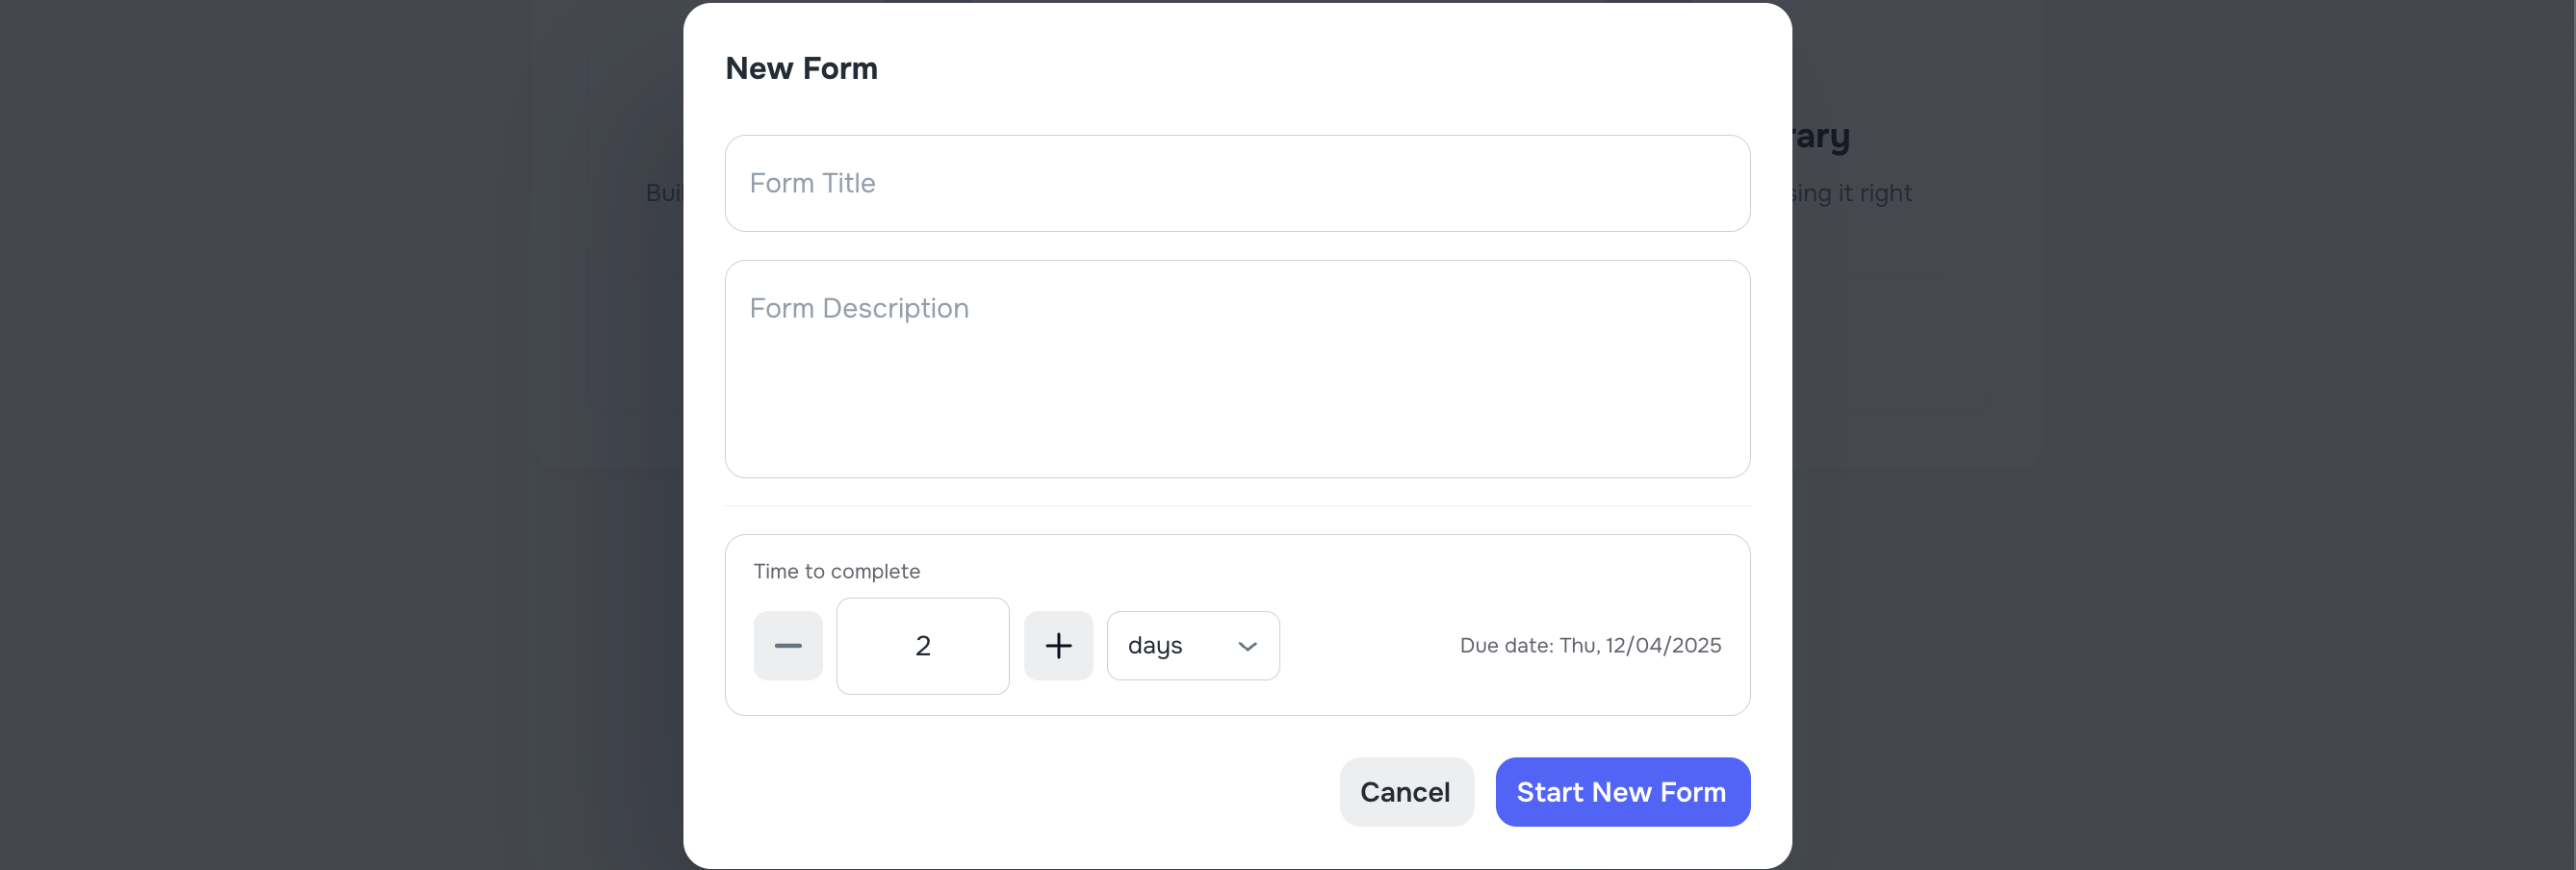
Each form includes:
- Name
- Description
- Pages
- Tasks inside pages
Note: The Form Title and Description are visible only to your team. Clients never see them.
3.2 Add Pages
Pages split long forms into simple steps.
Each page has:
- Page title
- Page description
Clients see a progress bar as they complete pages.
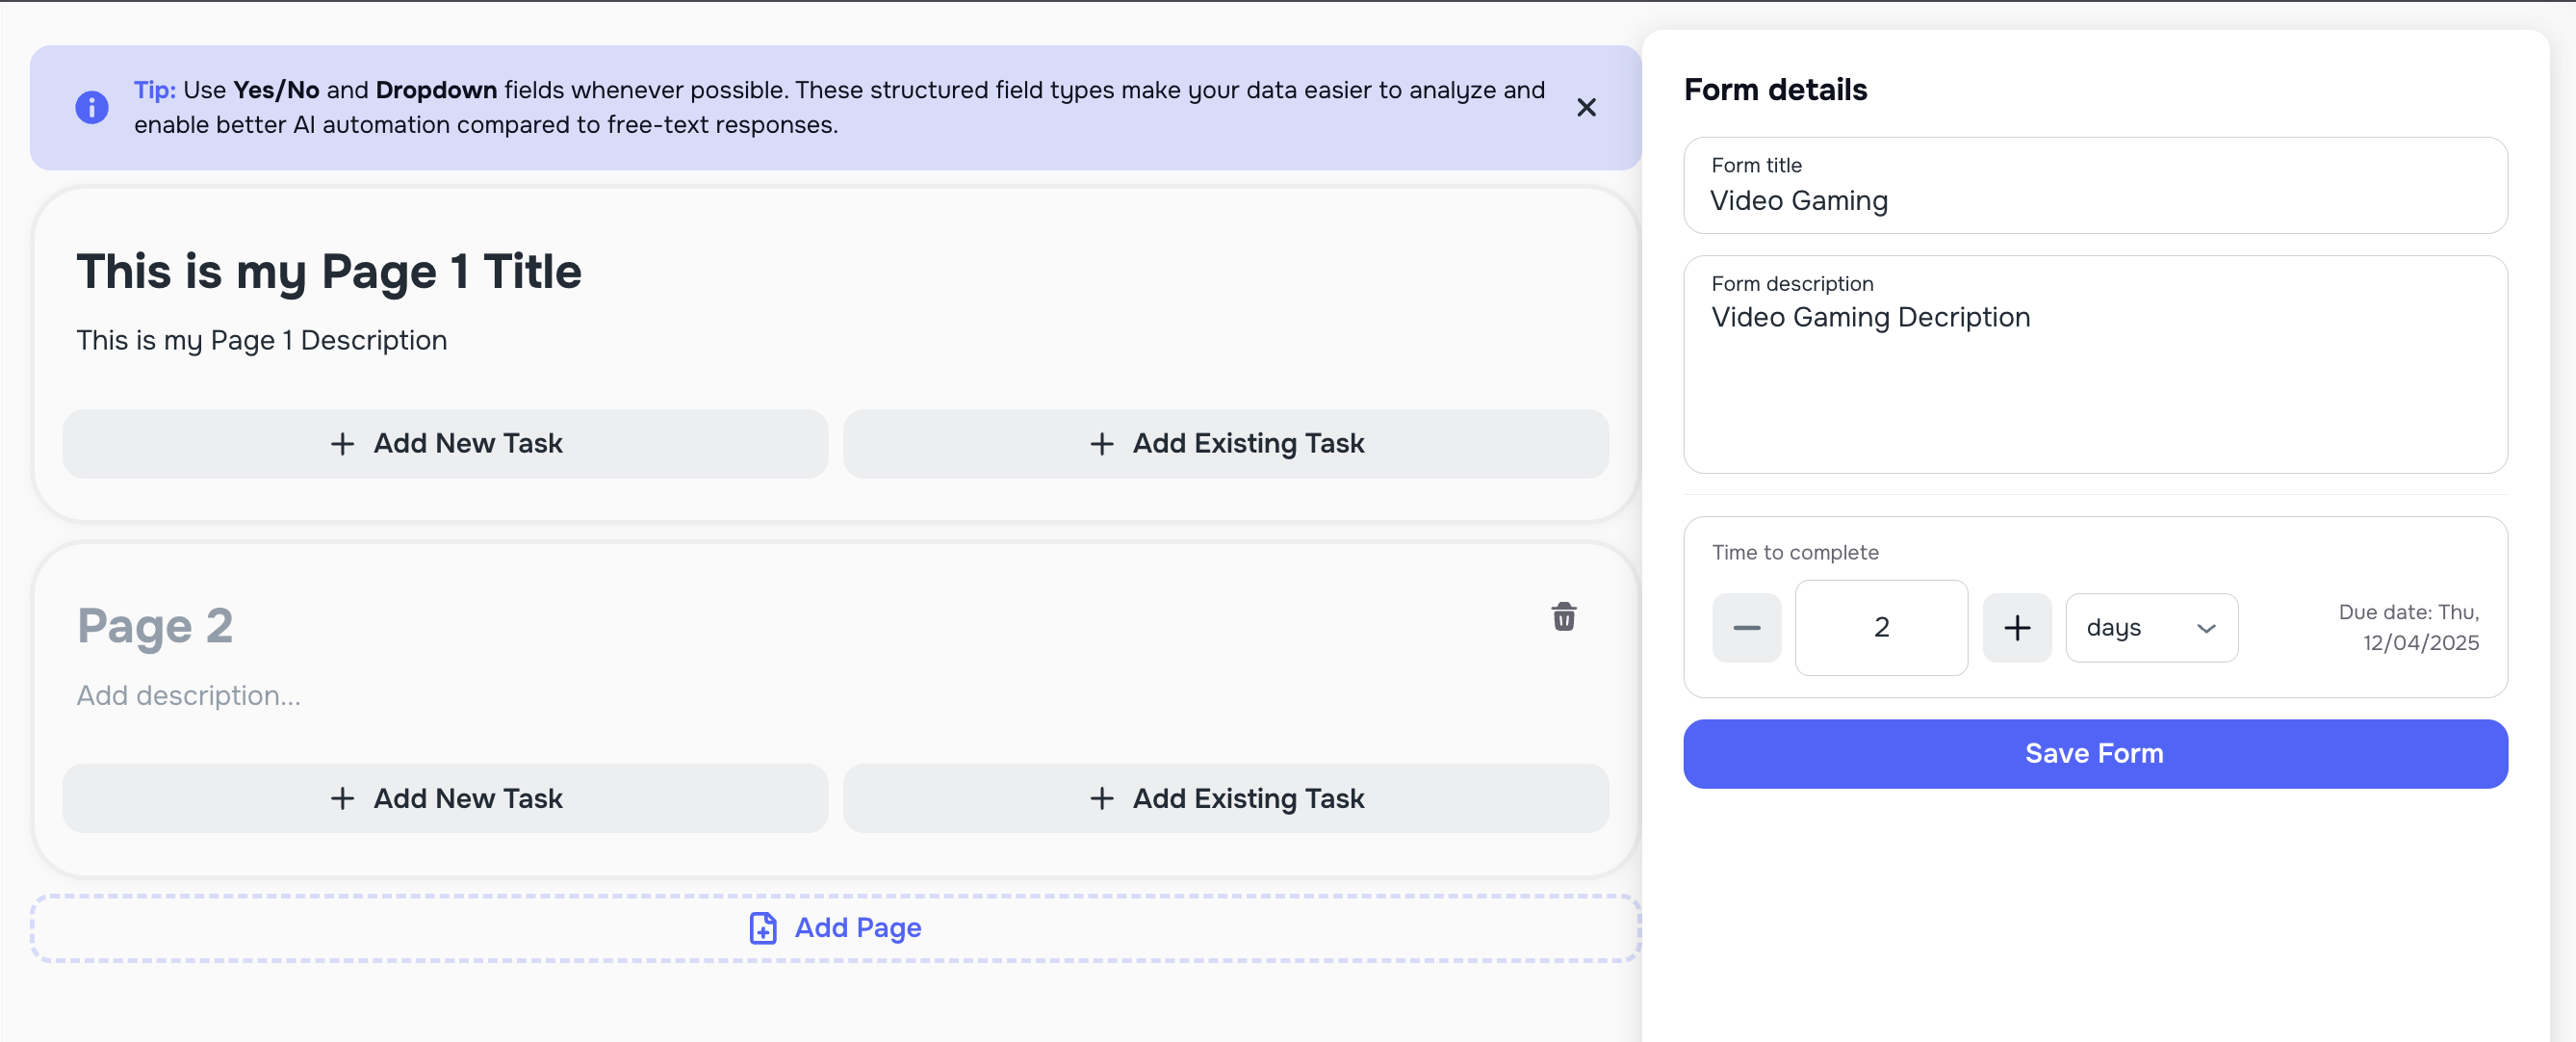
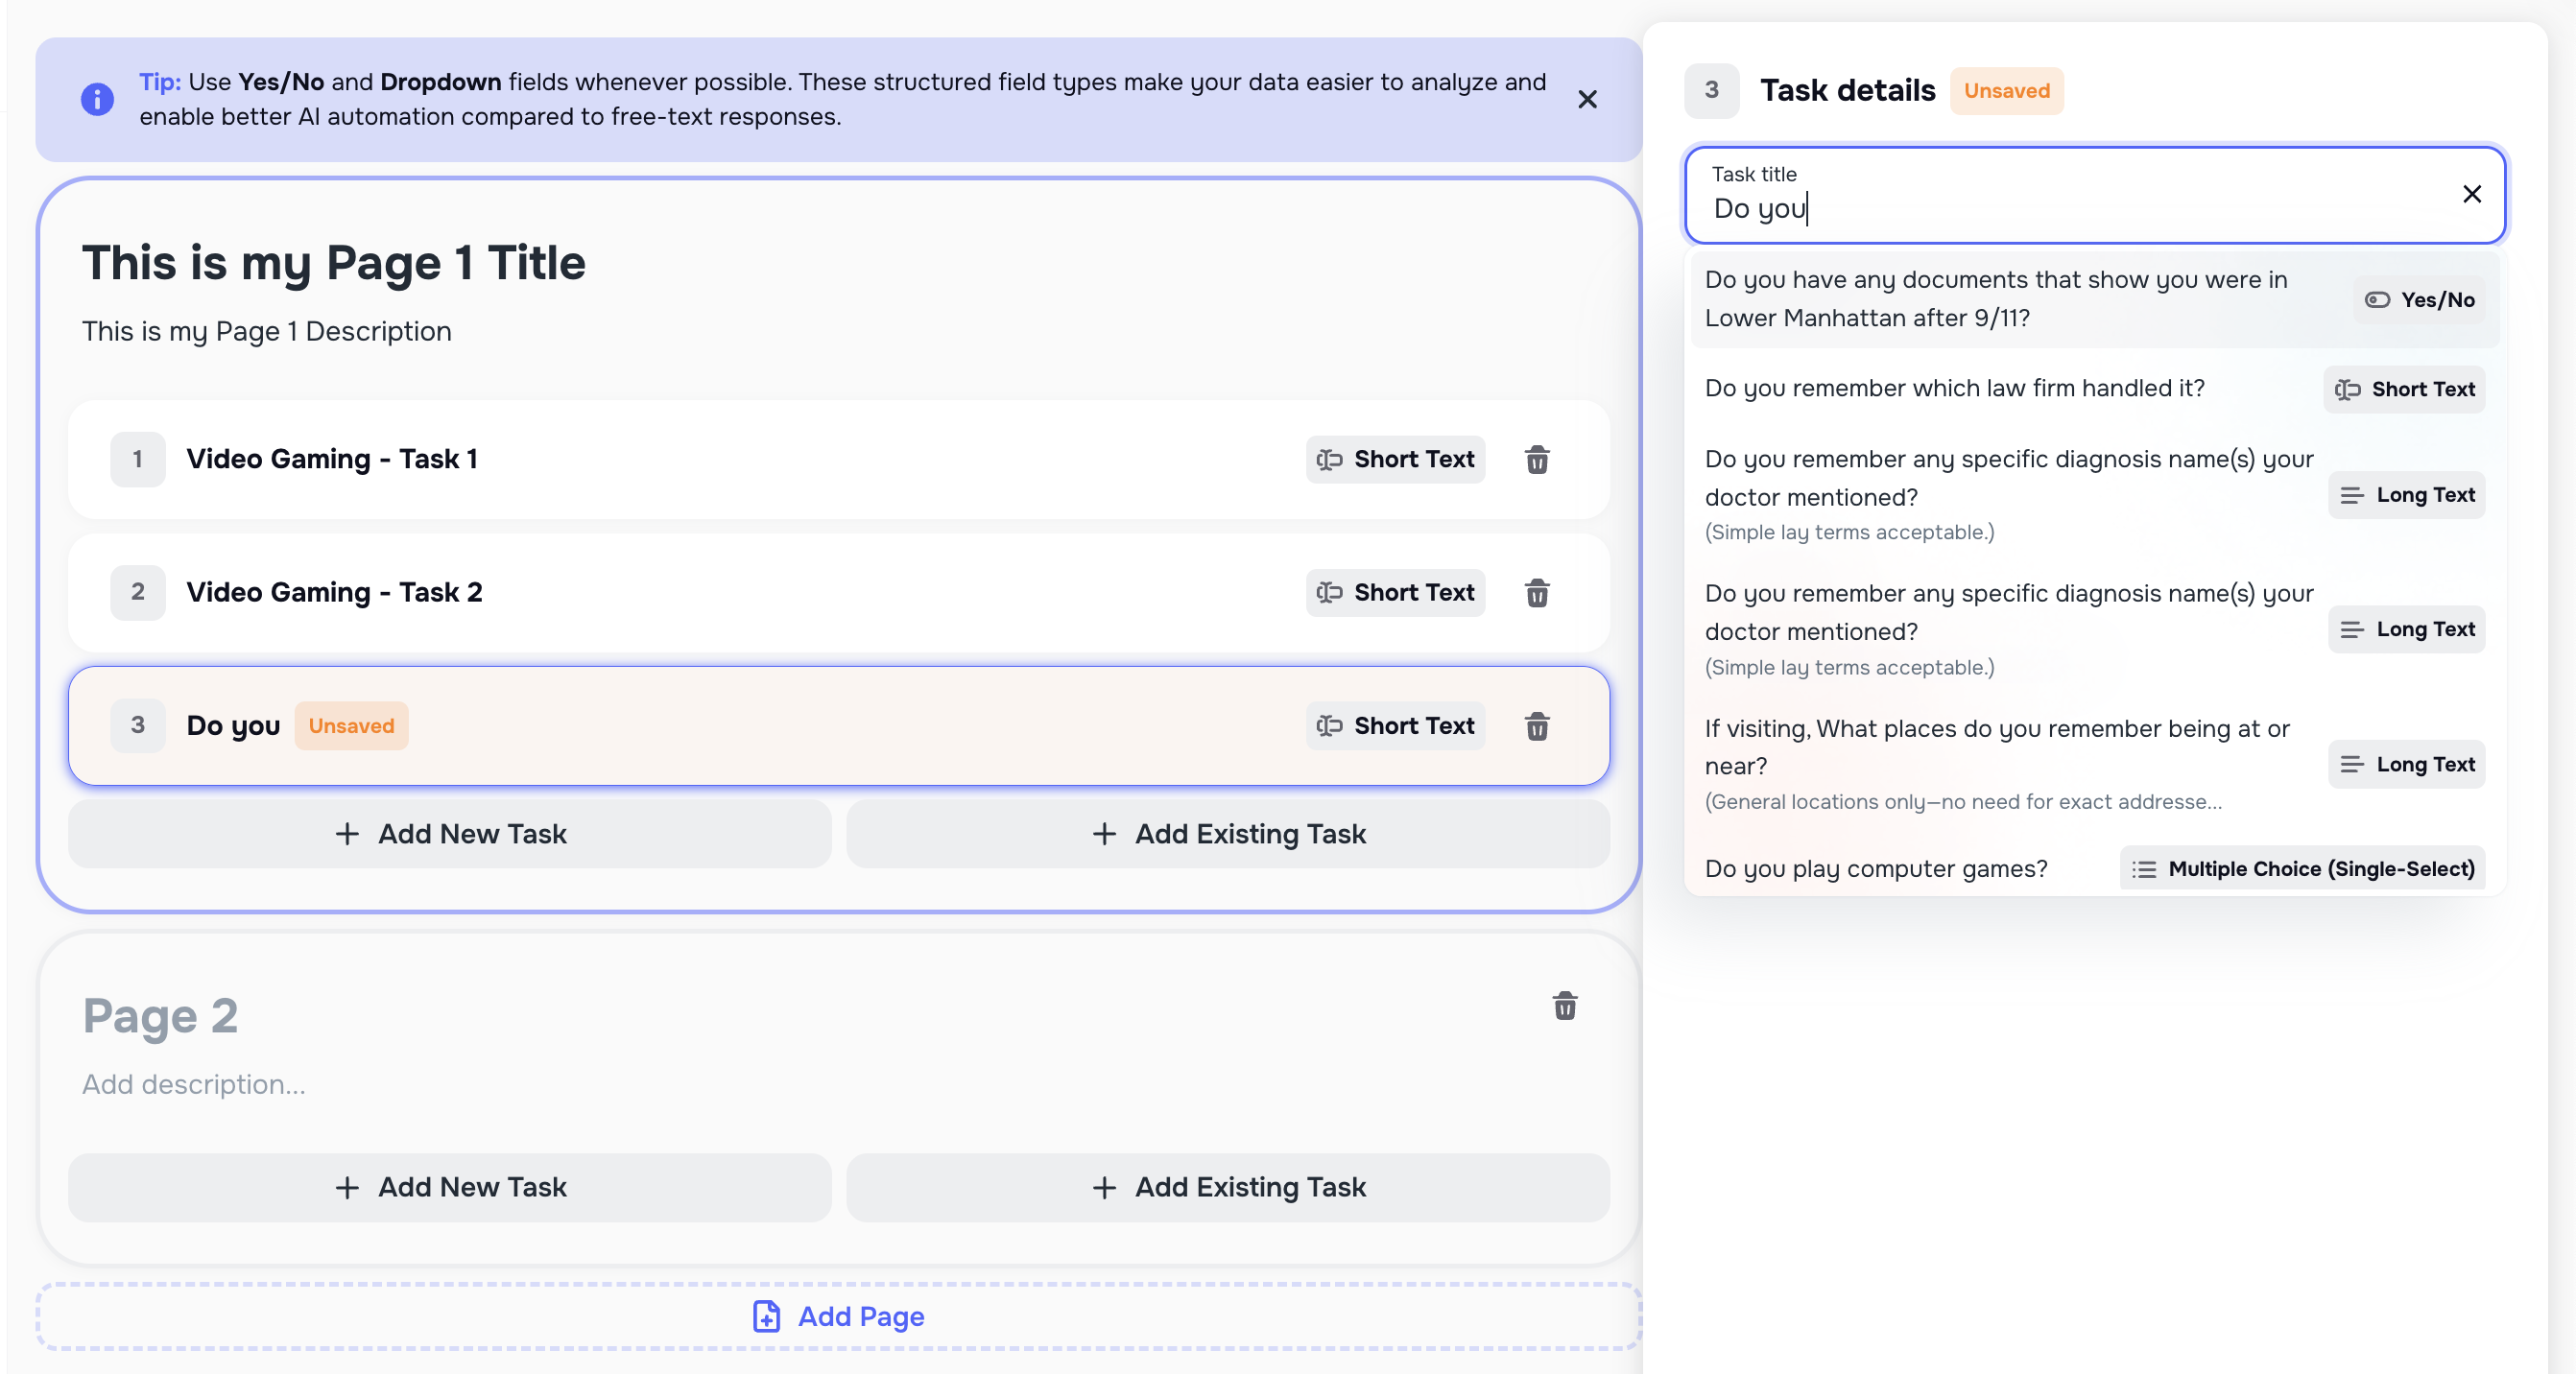
3.3 Add Tasks to a Page
When creating new tasks, the system suggests similar tasks from your Task Library. This helps you avoid duplicates and keep tasks consistent across all Forms.
You can add tasks in two ways:
- ➕ Add New Task
- 📚 Add Existing Task (from the Task Library)
All new tasks are automatically saved to the Task Library so you can reuse them later.

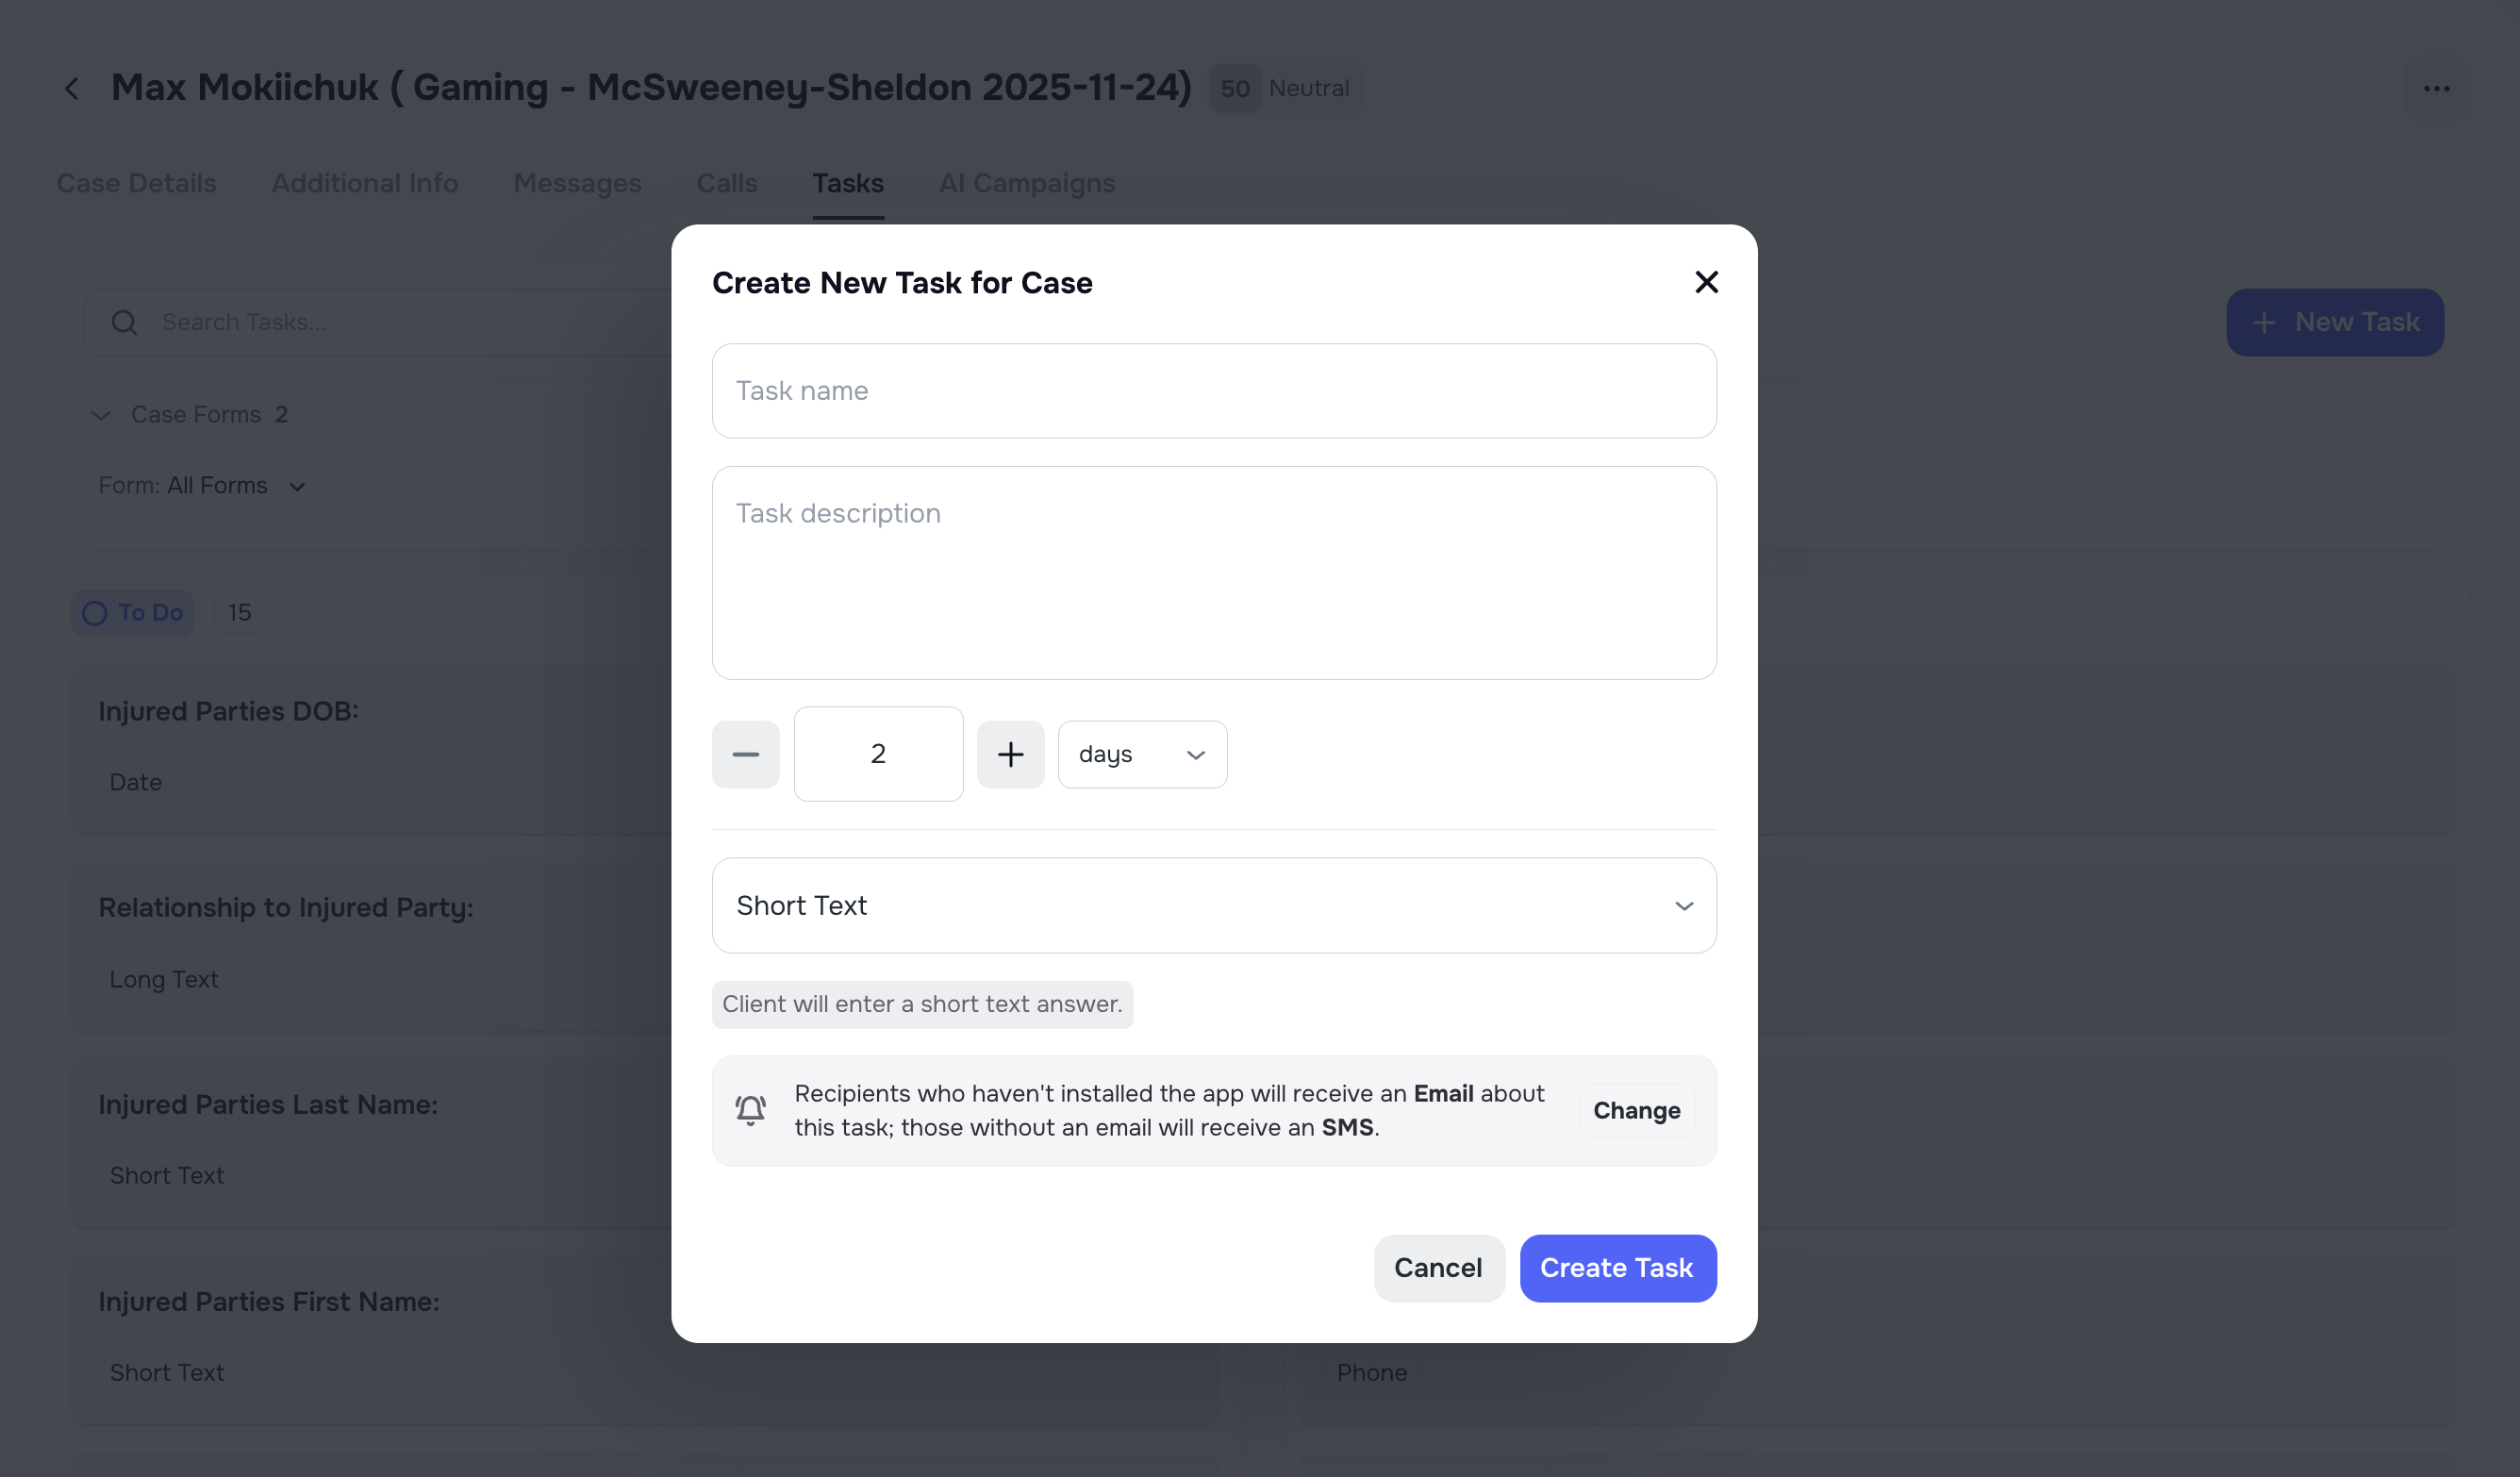
3.4 Choose Task Settings
After you add a task, choose how it should work.
The most important task settings are:
- Task name so the client knows what the question is
- Description so the client knows what to do
- Input type so Kayse knows what kind of answer to collect
- Required or optional so you decide whether the client must answer it
- Validation such as allowed file types, min or max values, or answer length
- Allow multiple values for supported field types like short text, email, phone, and separate address lines
Use Required for information the client must provide before the workflow is considered complete. Use Optional for helpful but non-blocking questions.
On supported tasks, clients can also add more than one answer when Allow multiple values is turned on. For example, they can add more than one phone number, email, short text value, or address line entry.
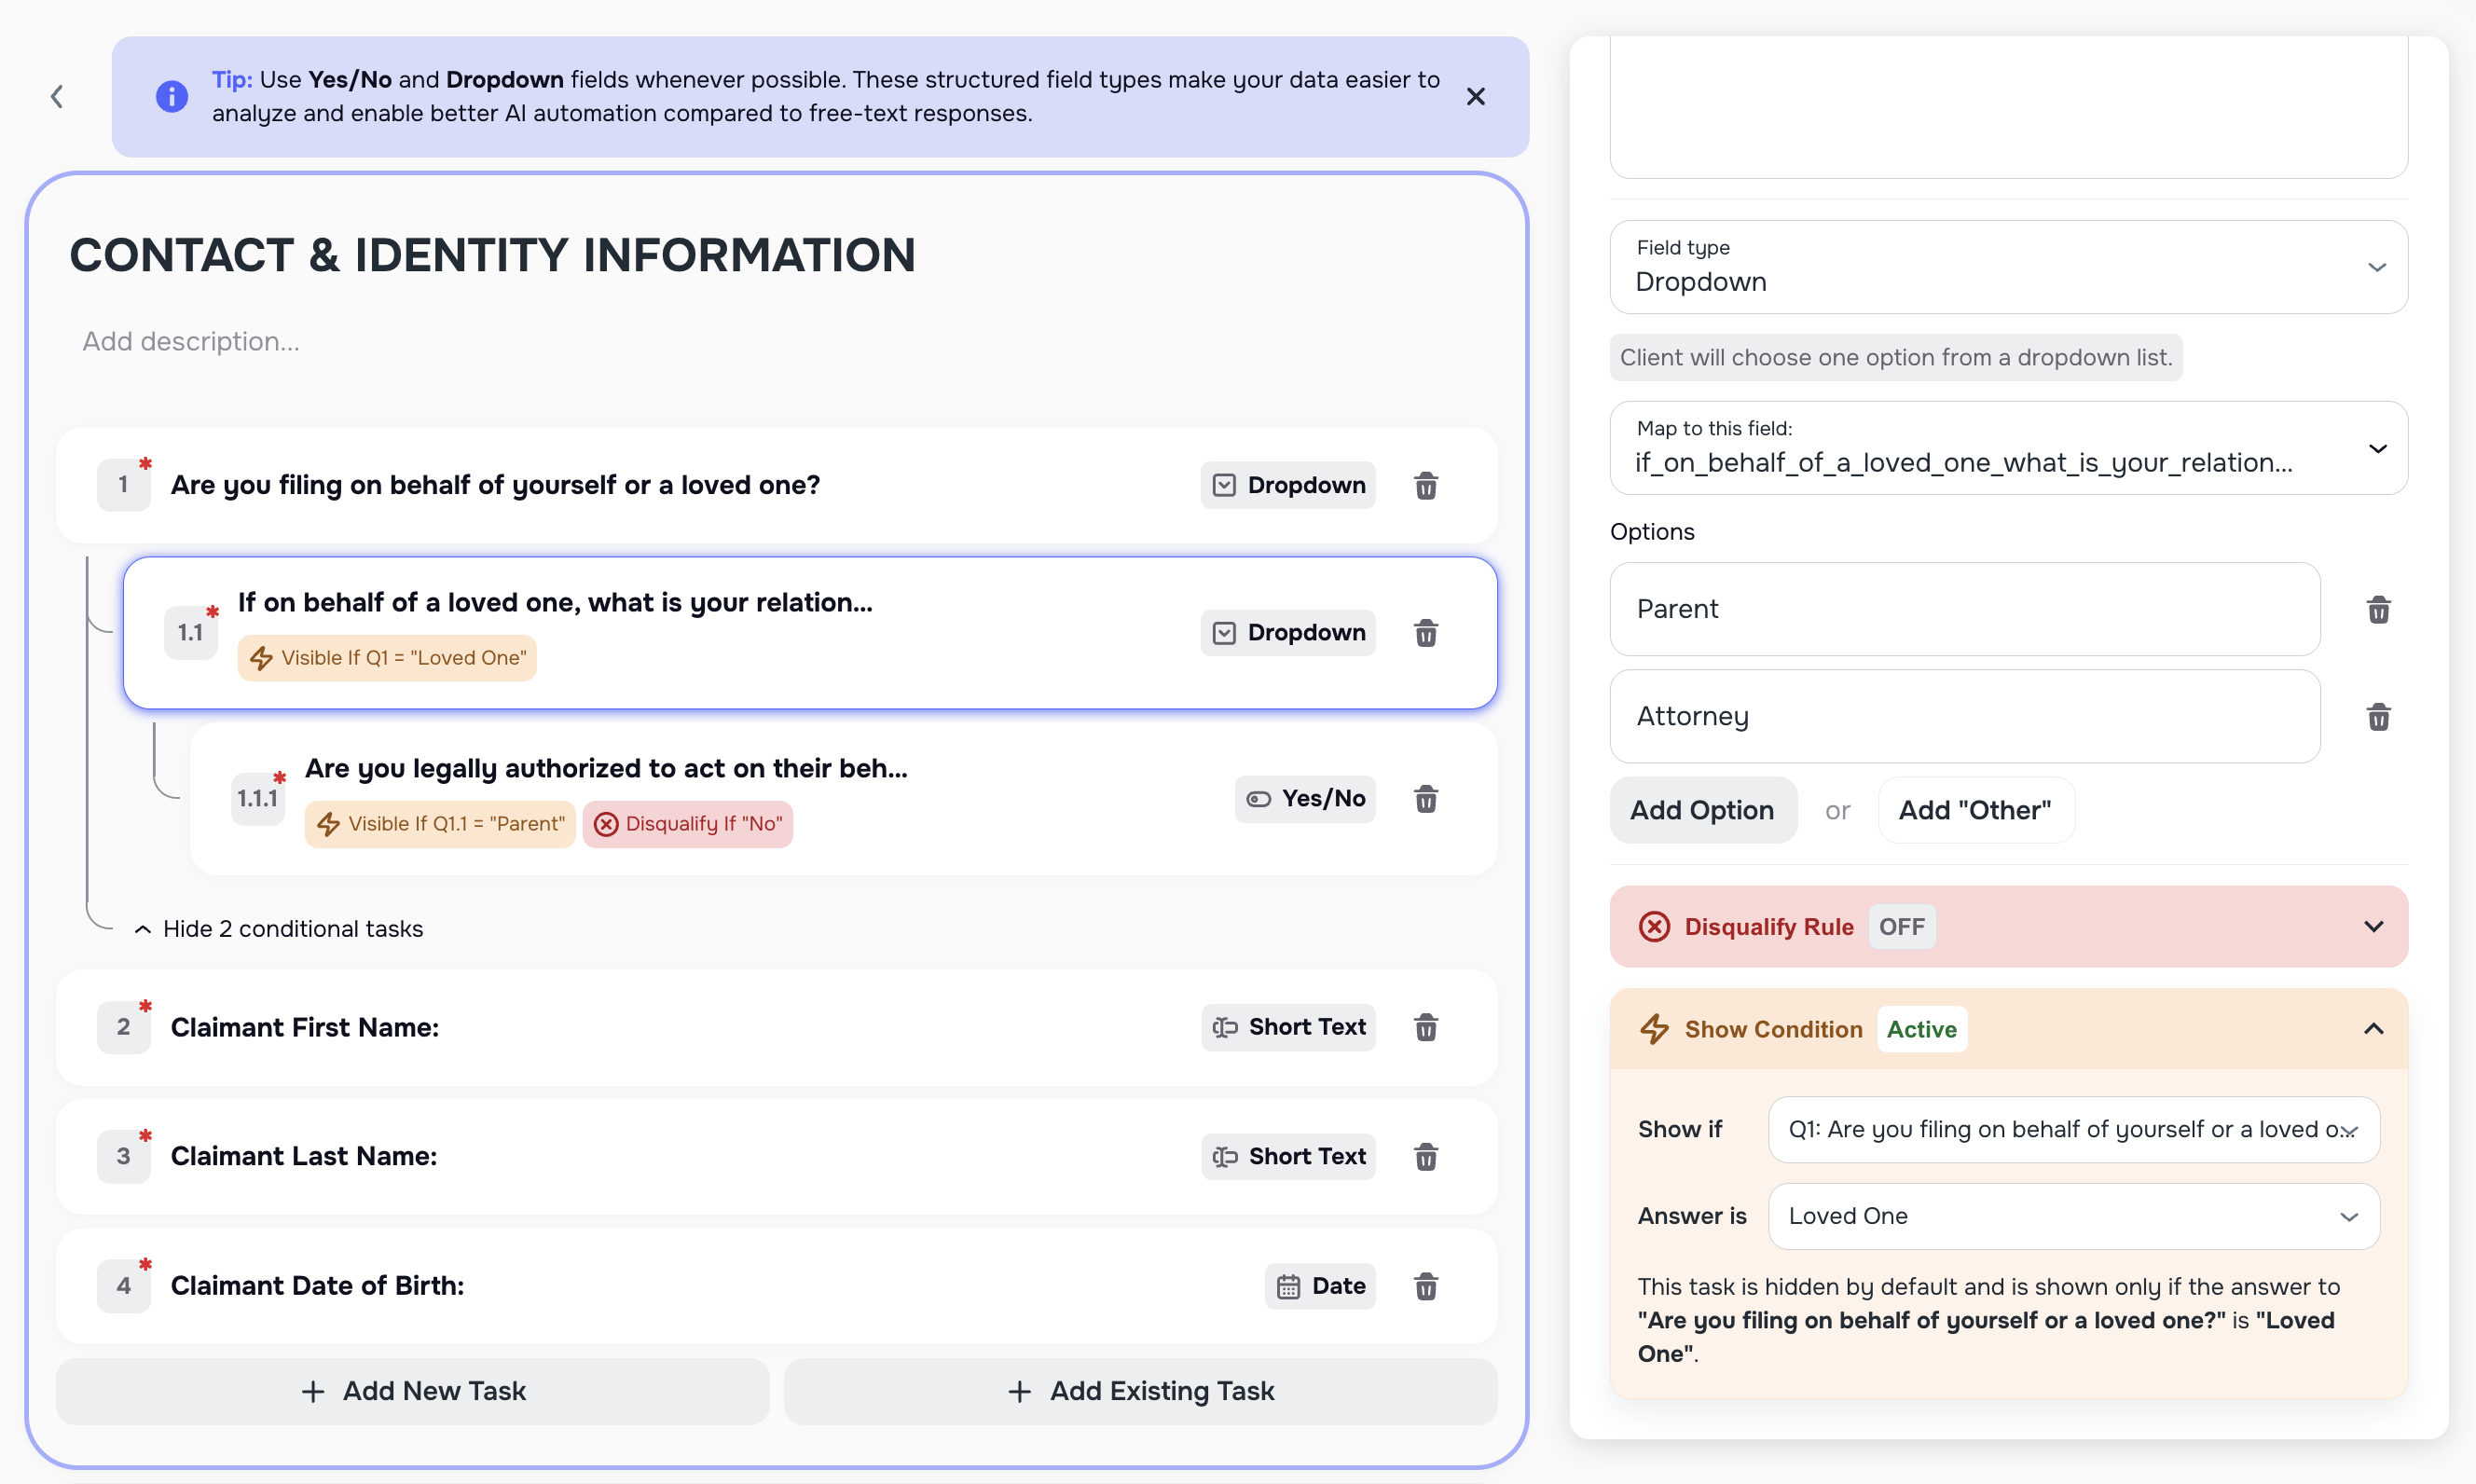
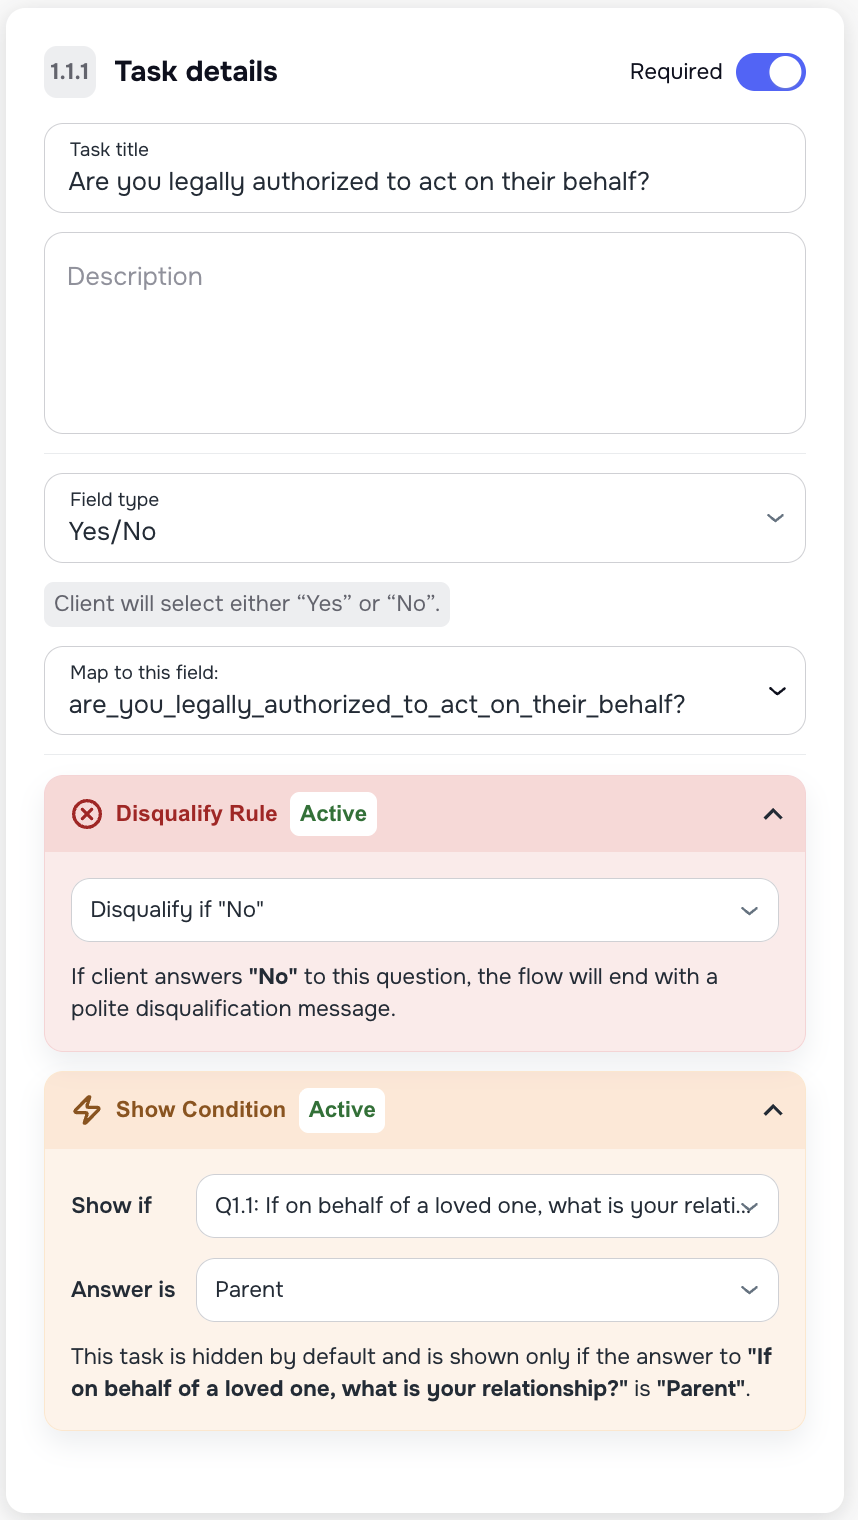
3.5 Conditional Logic, Page Visibility, and Disqualify Rules
Conditional logic tells the form when to show or hide questions.
Think of it like this:
- If the client answers Yes, show the follow-up question.
- If the client answers No, hide the follow-up question.
Kayse supports three related tools:
- Show Condition controls when one task appears.
- Page visibility controls when a whole page appears.
- Disqualify rule can stop the workflow early when a certain answer means the form should end.
Both Show Condition and Page visibility use answers from earlier questions, so the client always answers the first question before Kayse decides whether to show the next one.
You can also choose AND or OR rules:
- AND means every rule must match.
- OR means any one rule can match.
Common operators include:
- Equals
- Does not equal
- Contains
- Greater than / less than for numbers and date-style answers
- Is completed
- Is not completed
- Has any answer
Example:
- If Were you hospitalized? = Yes, show Hospital name and Upload hospital records.
Page visibility is useful when a whole section only matters for certain clients. For example, you can hide an entire insurance page unless the client says they had insurance coverage.
Disqualify rules are useful when a certain answer should stop the flow instead of asking unnecessary questions.
3.6 Configure Field Mapping
Task answers can be saved as structured Kayse data instead of living only inside a completed form. Use mapping when an answer should update a case field, appear in reporting, or sync to a connected CRM.
There are two common mapping paths:
- Custom field mapping connects a task answer to a Kayse custom field. The answer is stored on the case and can be reused in reports, filters, workflows, and later CRM mapping.
- CRM field mapping connects the Kayse field to a SmartAdvocate or LawRuler destination field. Kayse sends the saved value to the CRM only when the CRM integration, case type, and field mapping are configured.
The important idea is:
- The client answers the task.
- Kayse stores that answer on the mapped Kayse field.
- If CRM mapping is also configured, Kayse can send that saved value to the CRM field too.
The simplest setup path is:
- Open the task in the form builder.
- Choose the Kayse custom field the answer should update.
- Save the task so Kayse knows where to store the answer.
- If the value also needs to go to SmartAdvocate or LawRuler, open Settings -> Integrations -> CRM Mappings and map that same Kayse field to the correct CRM field.
When a task question is mapped, Kayse shows a Mapped label in the builder so your team can see which questions already write to structured fields.
For the full CRM and import mapping flow, see:
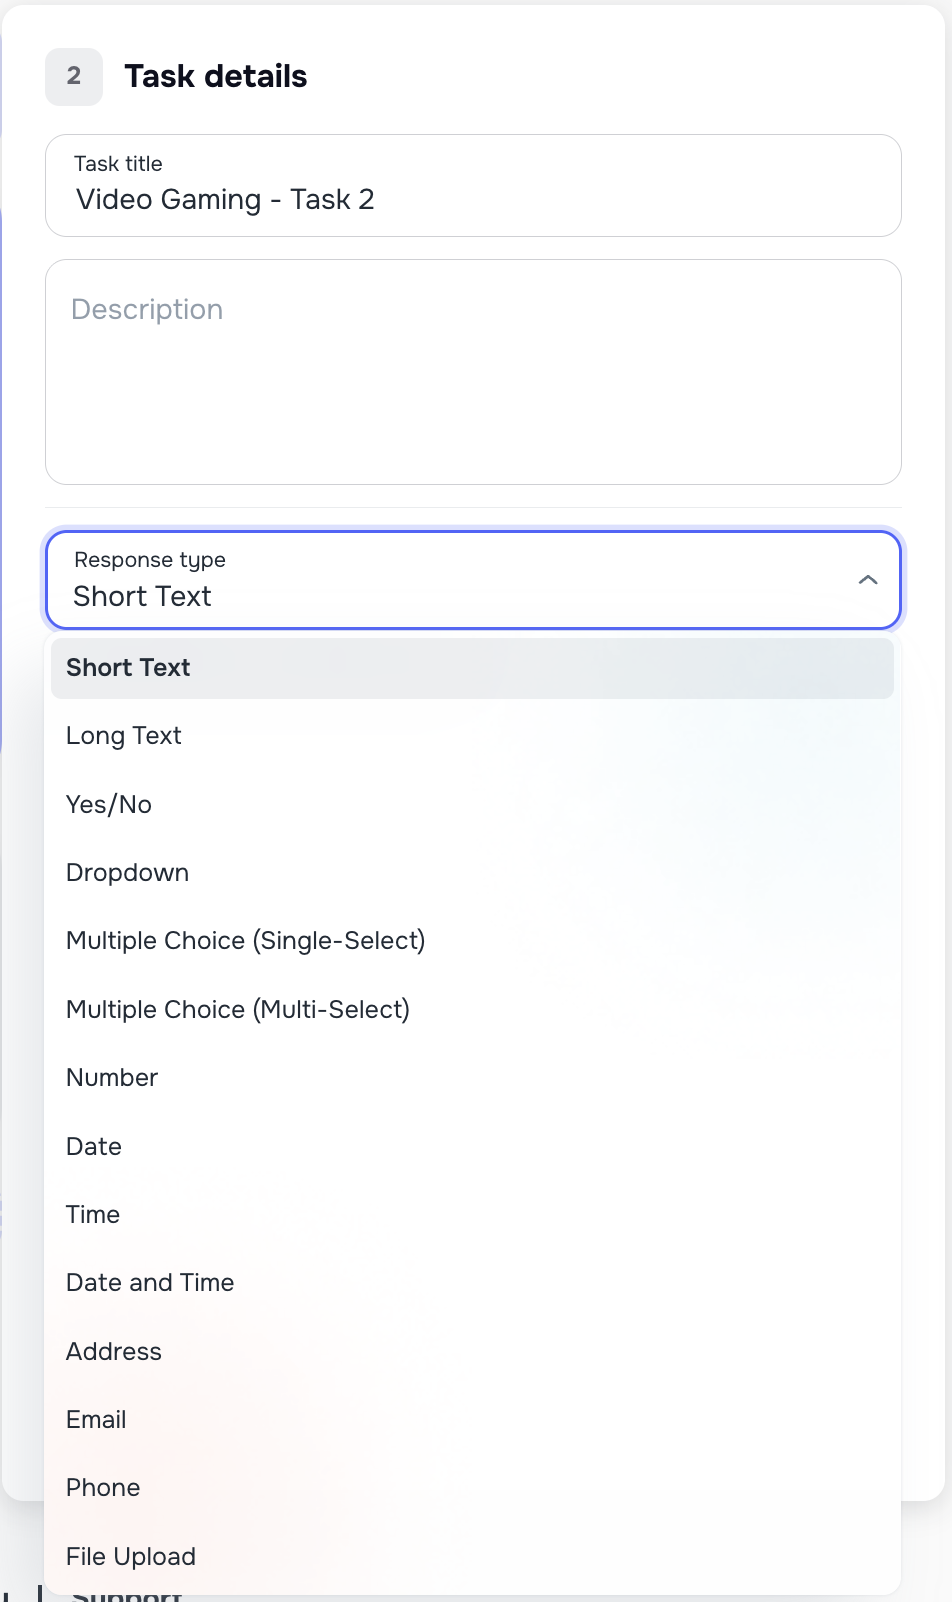
🔧 4. Task Input Types
Smart Tasks support many input types so you can collect exactly what you need.
Text fields
- Short Text for quick answers
- Long Text for detailed written answers
Number fields
- Number for plain numeric answers
- Range for a number that must stay between a minimum and maximum
- Currency for money amounts
- Percentage for percent-based answers
Date and time fields
- Date
- Time
- Date & Time
- Date Range
Selection fields
- Yes / No
- Dropdown
- Radio Buttons or other single-choice options
- Checkboxes or other multi-choice options
File fields
- File Upload
- Multiple Files
- Image Upload
- Document Upload
Contact and address fields
- Phone
- Address for one full address box
- Address line 1
- Address line 2
- City
- State
- ZIP or postal code
Tip: Whenever possible, use structured field types like Yes/No, Dropdown, Single Choice, or Multiple Choice. These fields keep your data consistent and improve reporting and automation.
On client forms, structured address tasks and supported multi-value fields show clear labels and an Add another action when more than one value is allowed.
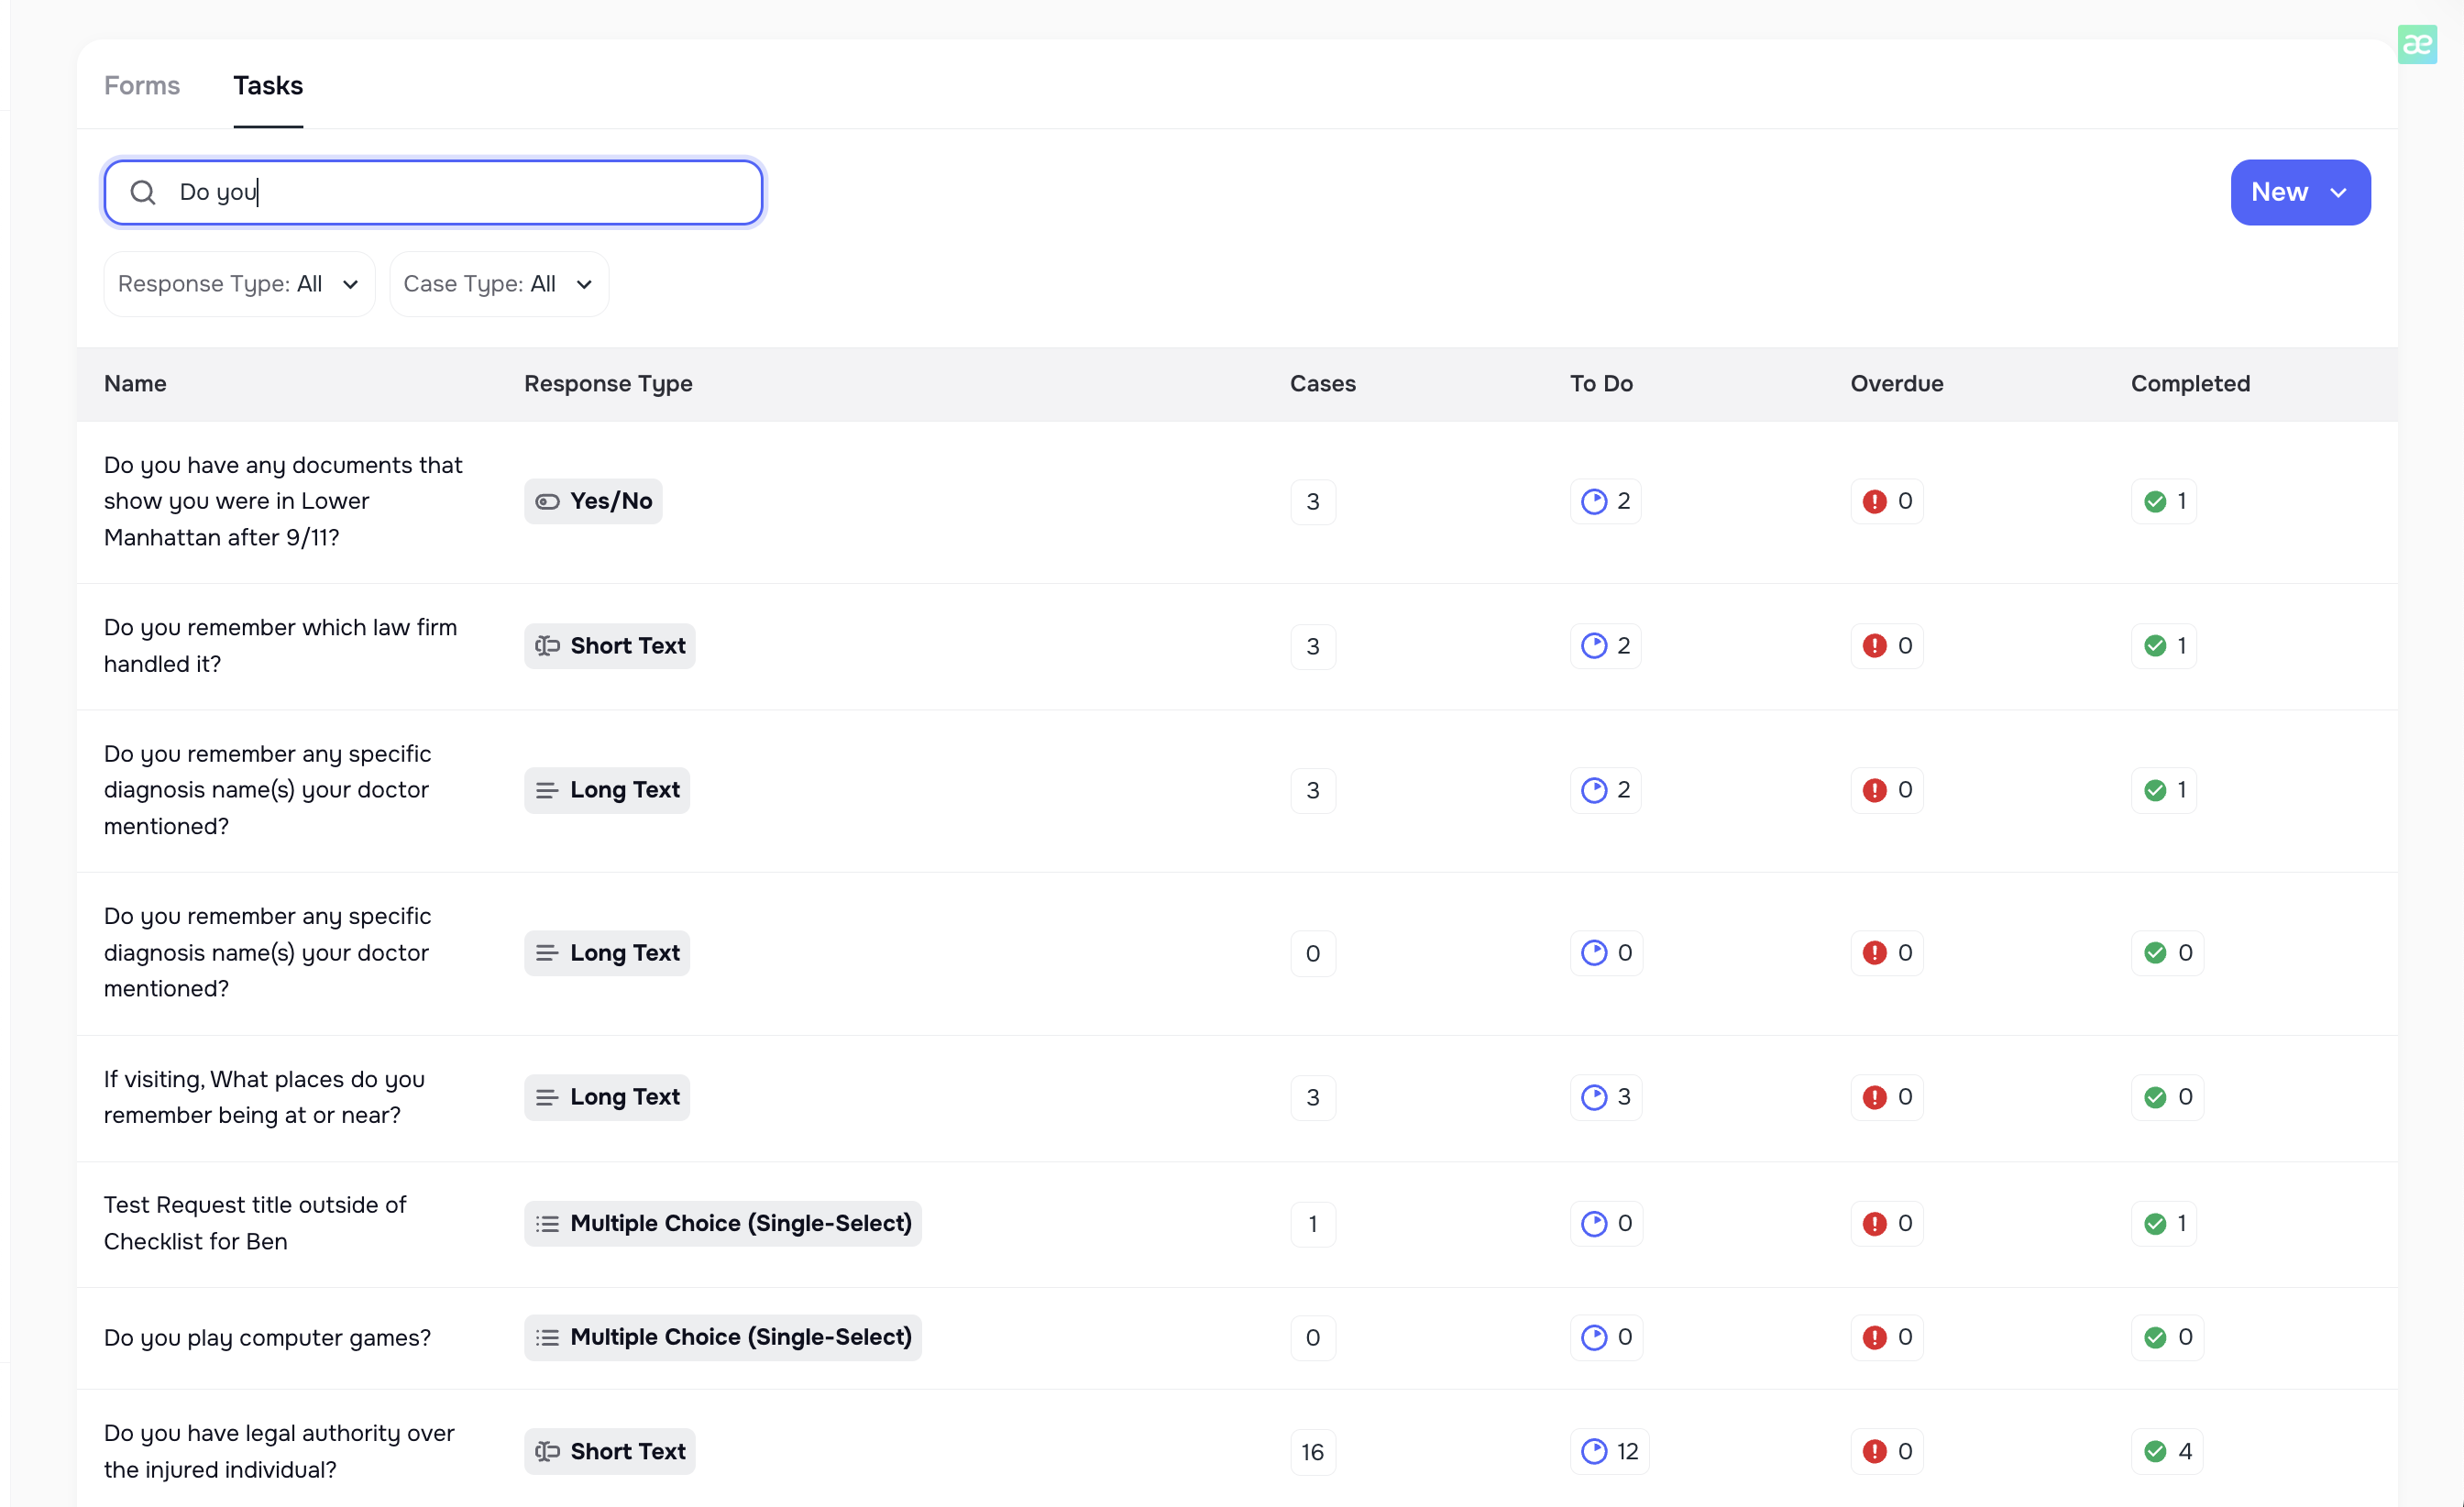
📚 5. Task Library
Go to the Tasks page in the left side bar menu and select the Tasks tab to access the following page:
The Task Library stores all tasks created in your system.
You can:
- Search tasks
- Filter by input type or case type
- See usage (To-Do, Completed, Overdue)
- Reuse tasks in new forms
- Avoid duplicates
Every time you create a new task inside a Form, it is automatically added to the Task Library for future reuse.
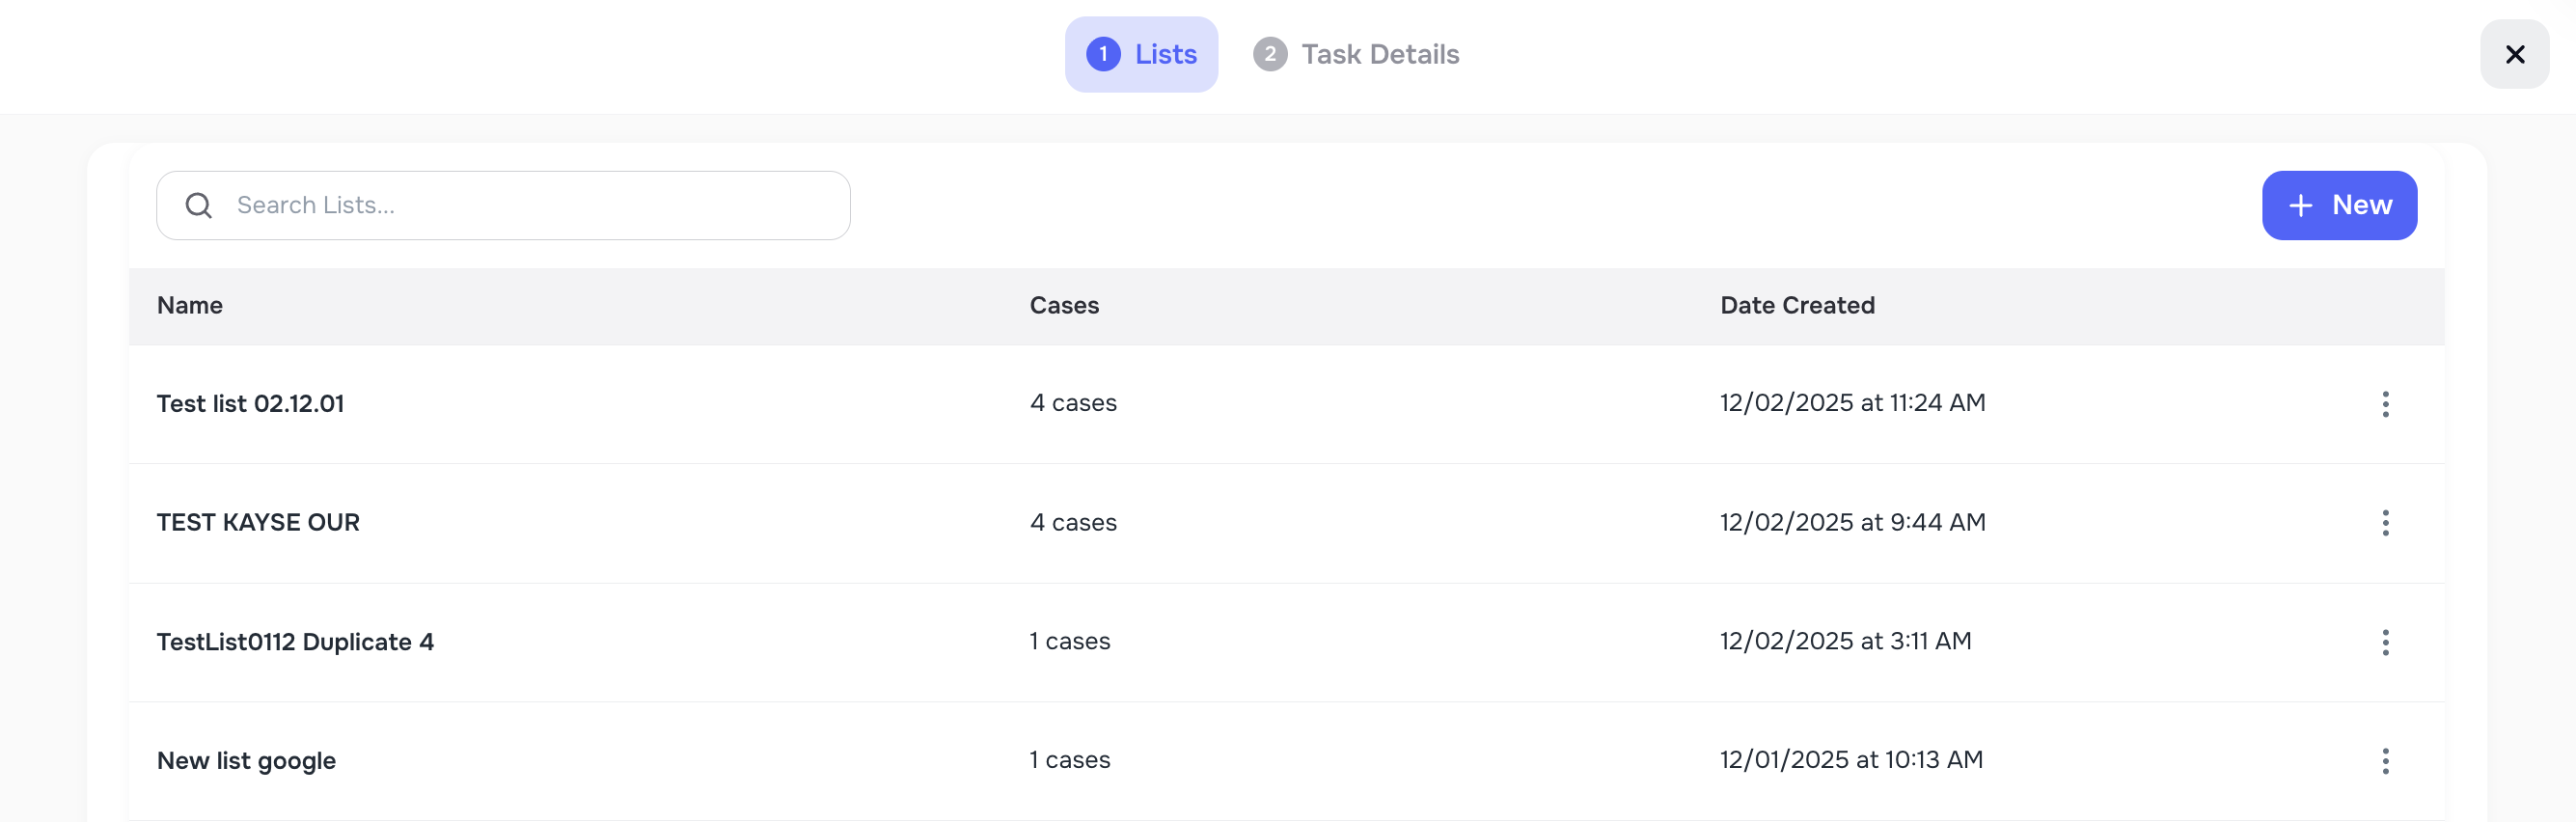
6. Viewing a Form (User View)
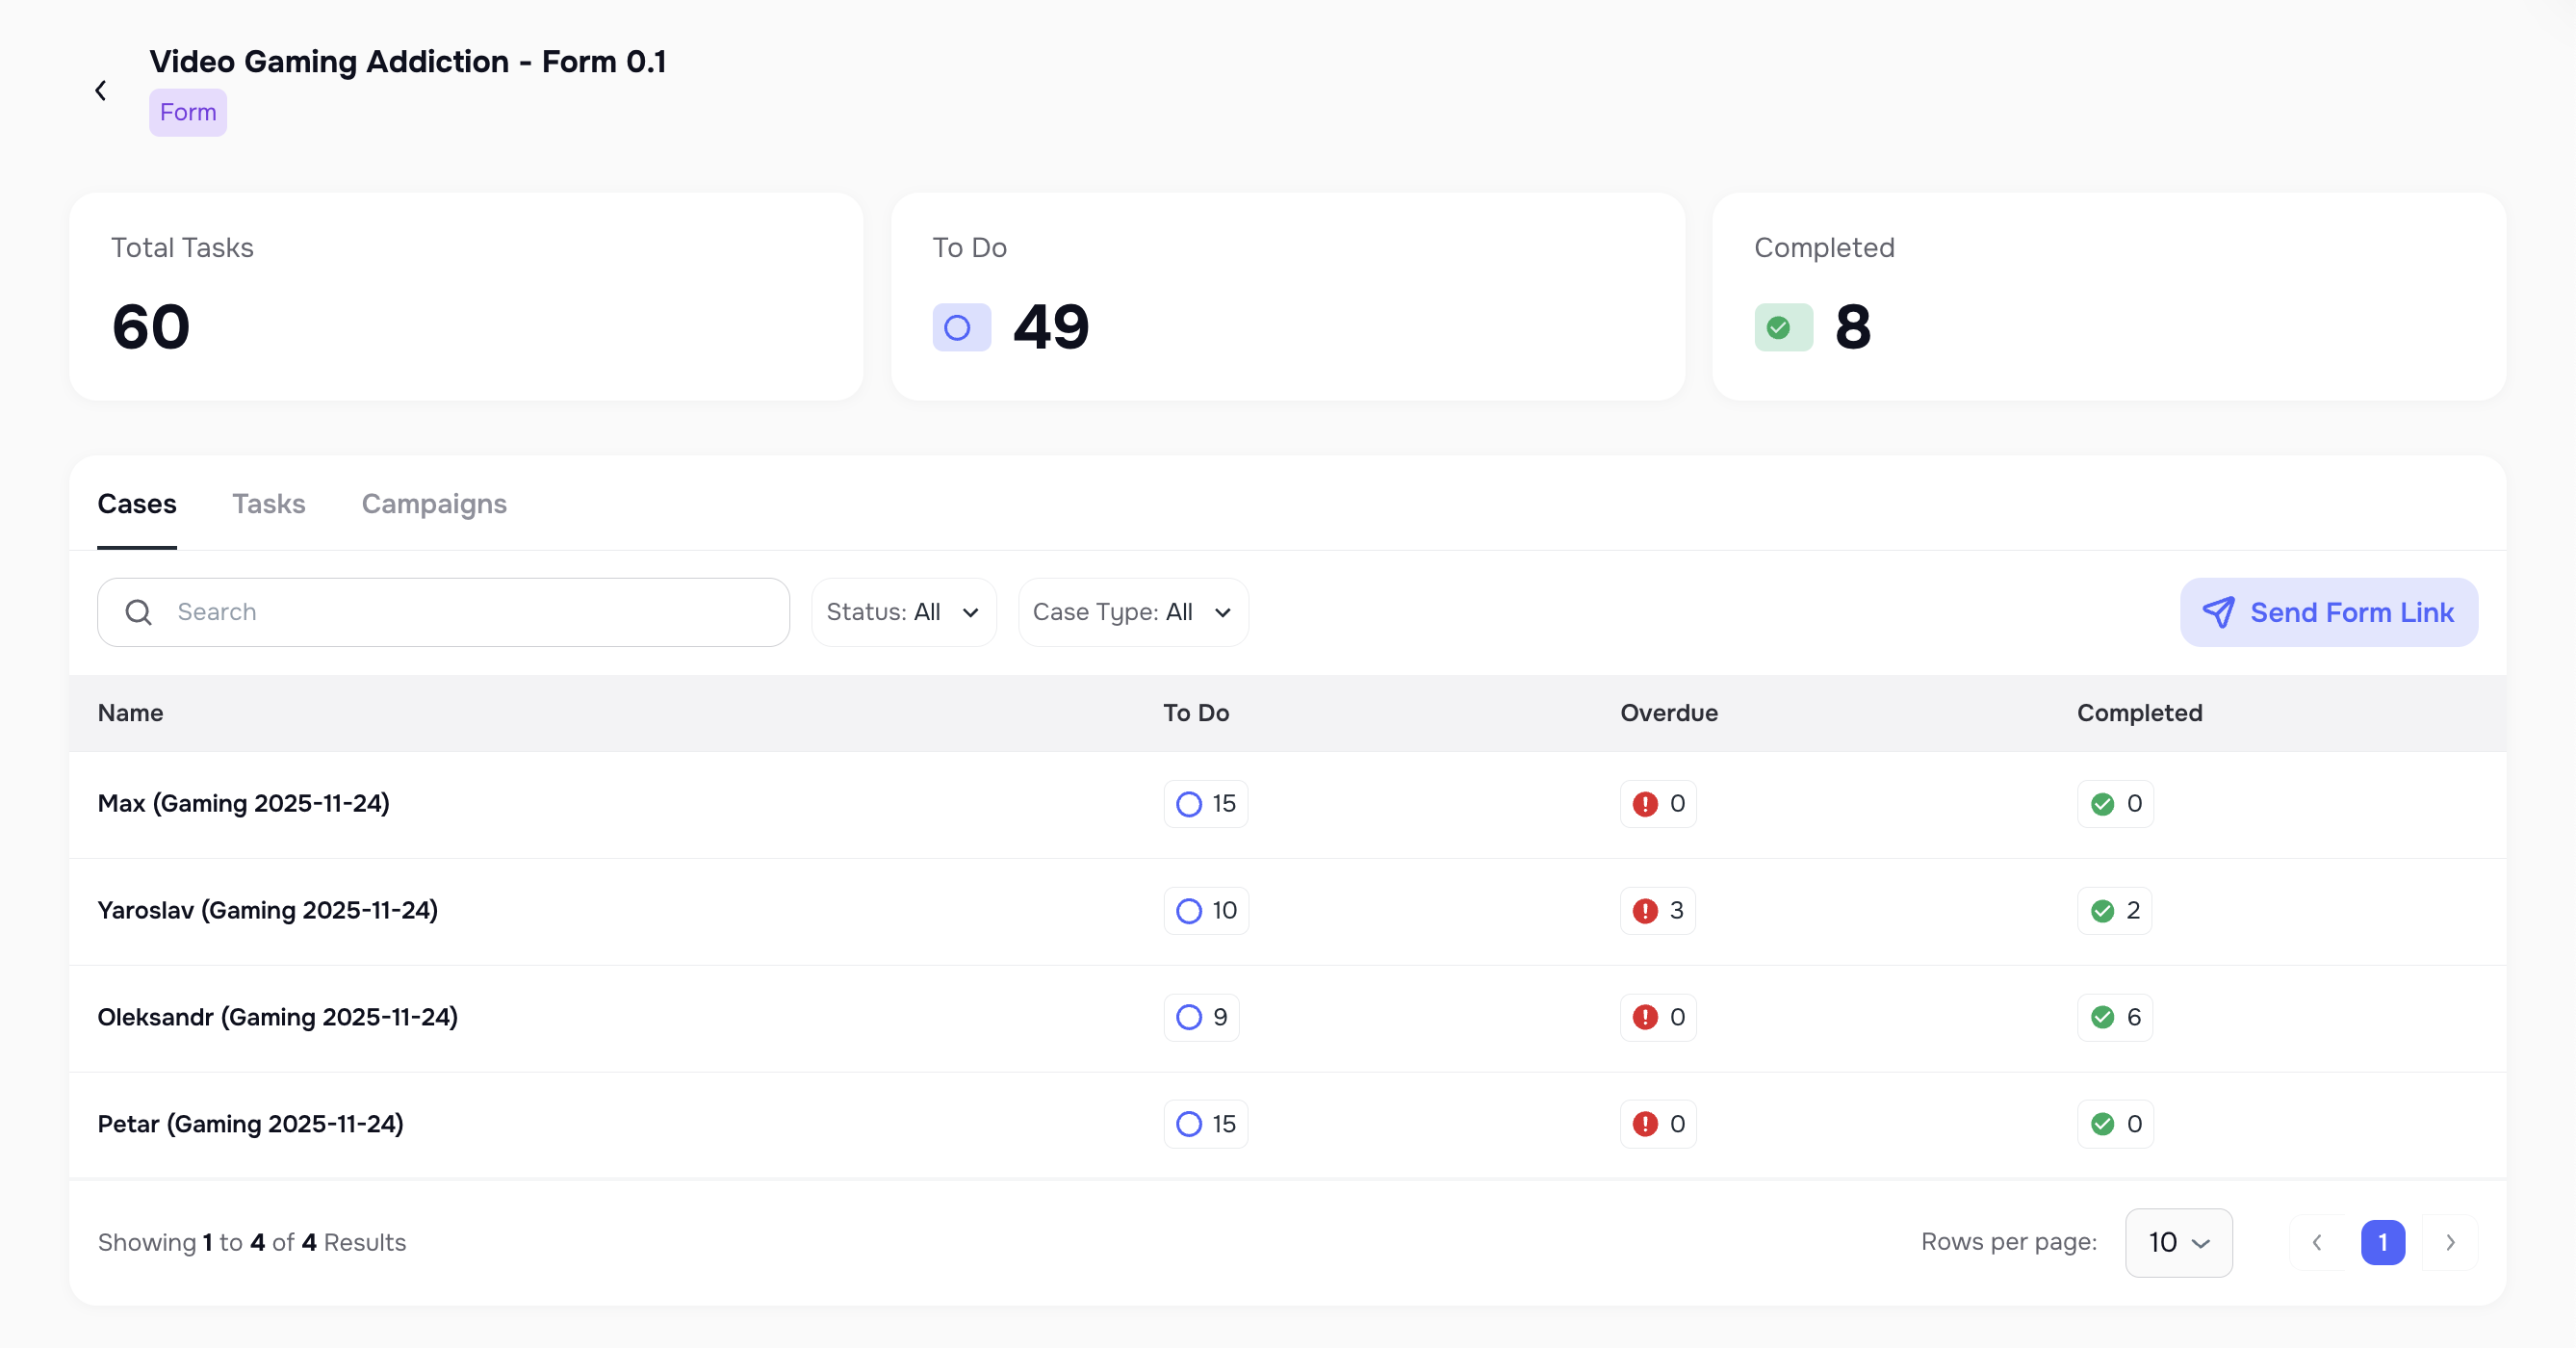
6.1 Case List View
This shows every Case linked to the form, including:
- Tasks completed
- Tasks still pending
- Overdue tasks
You can also send the form link to all cases that still have incomplete tasks.
These statistics represent the total number of tasks across all clients linked to this form, not for just one case.
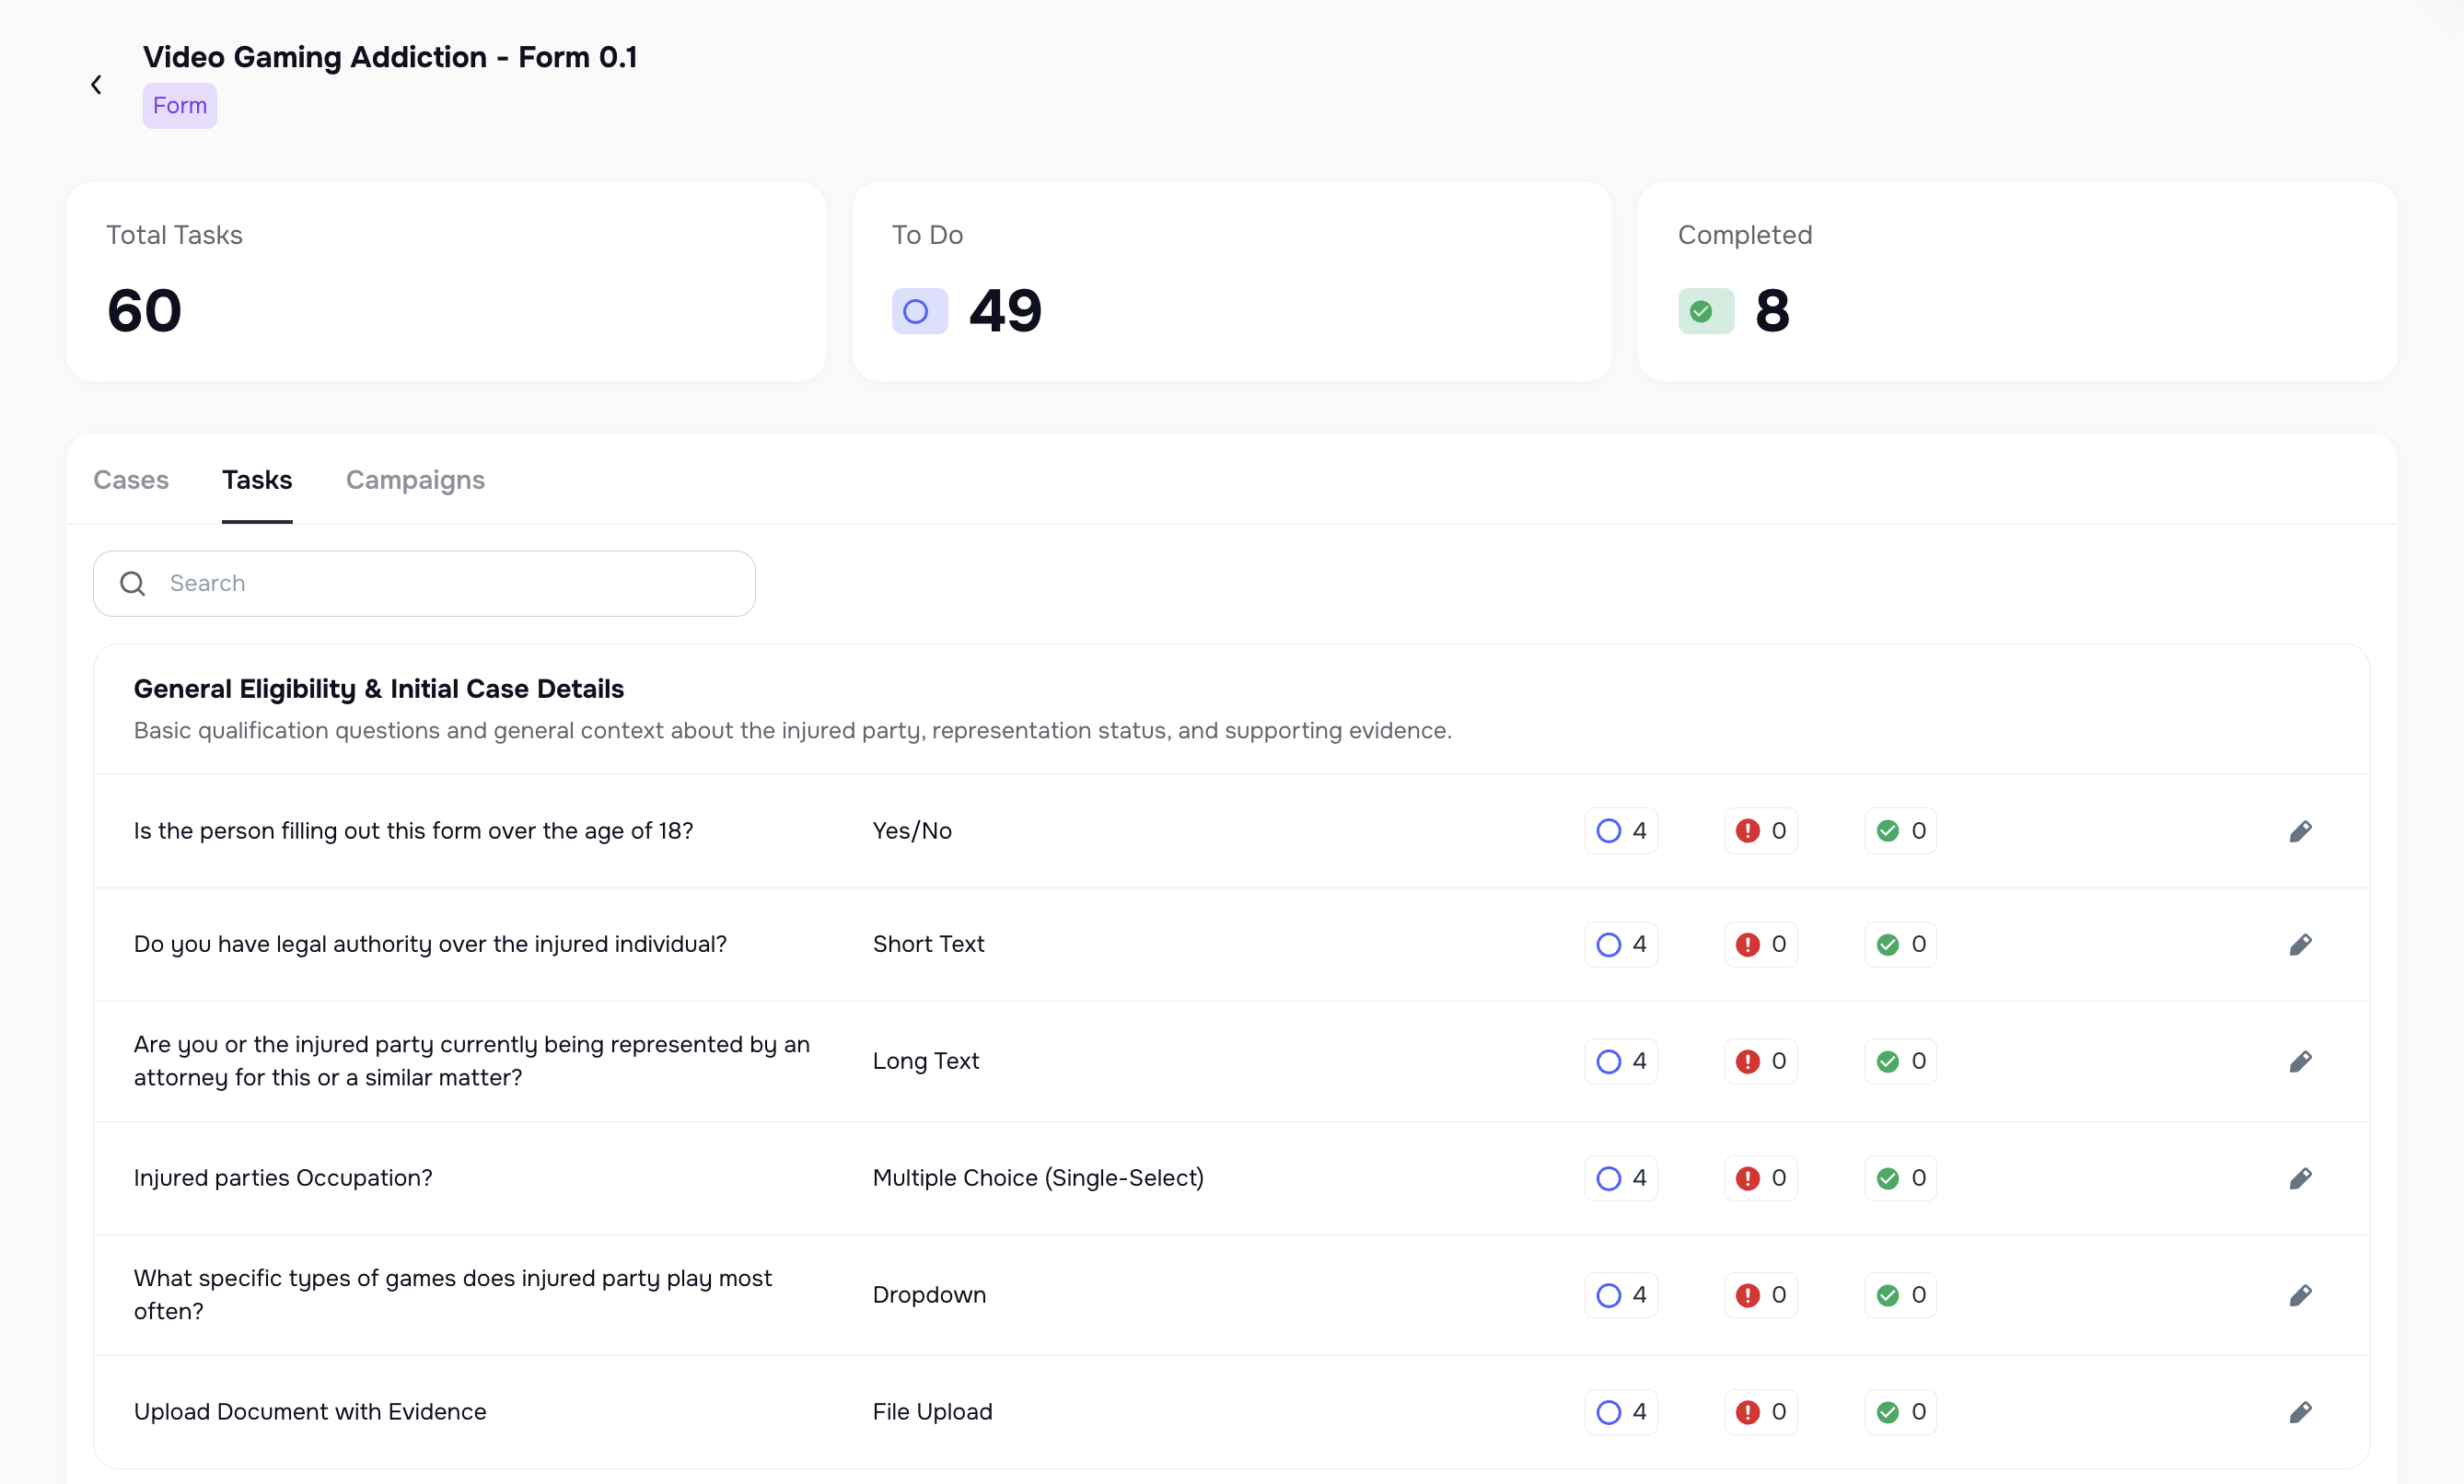
6.2 Tasks Inside the Form
This view shows all:
- Pages
- Tasks
- Task types
- Usage stats
⚠️ If a form is part of an active AI Campaign, most editing is locked.
7. Sending a Form to Clients
You can send a secure form link from:
- the Form page,
- the Case page,
- or an AI Campaign.
The system automatically chooses the best delivery channel based on the Notification settings in Company Settings -> Notifications:
- SMS
- Mobile Client Portal App
Clients click the link and complete tasks step-by-step.
If multiple delivery channels are enabled, the system automatically chooses the best available option based on the client’s contact information.

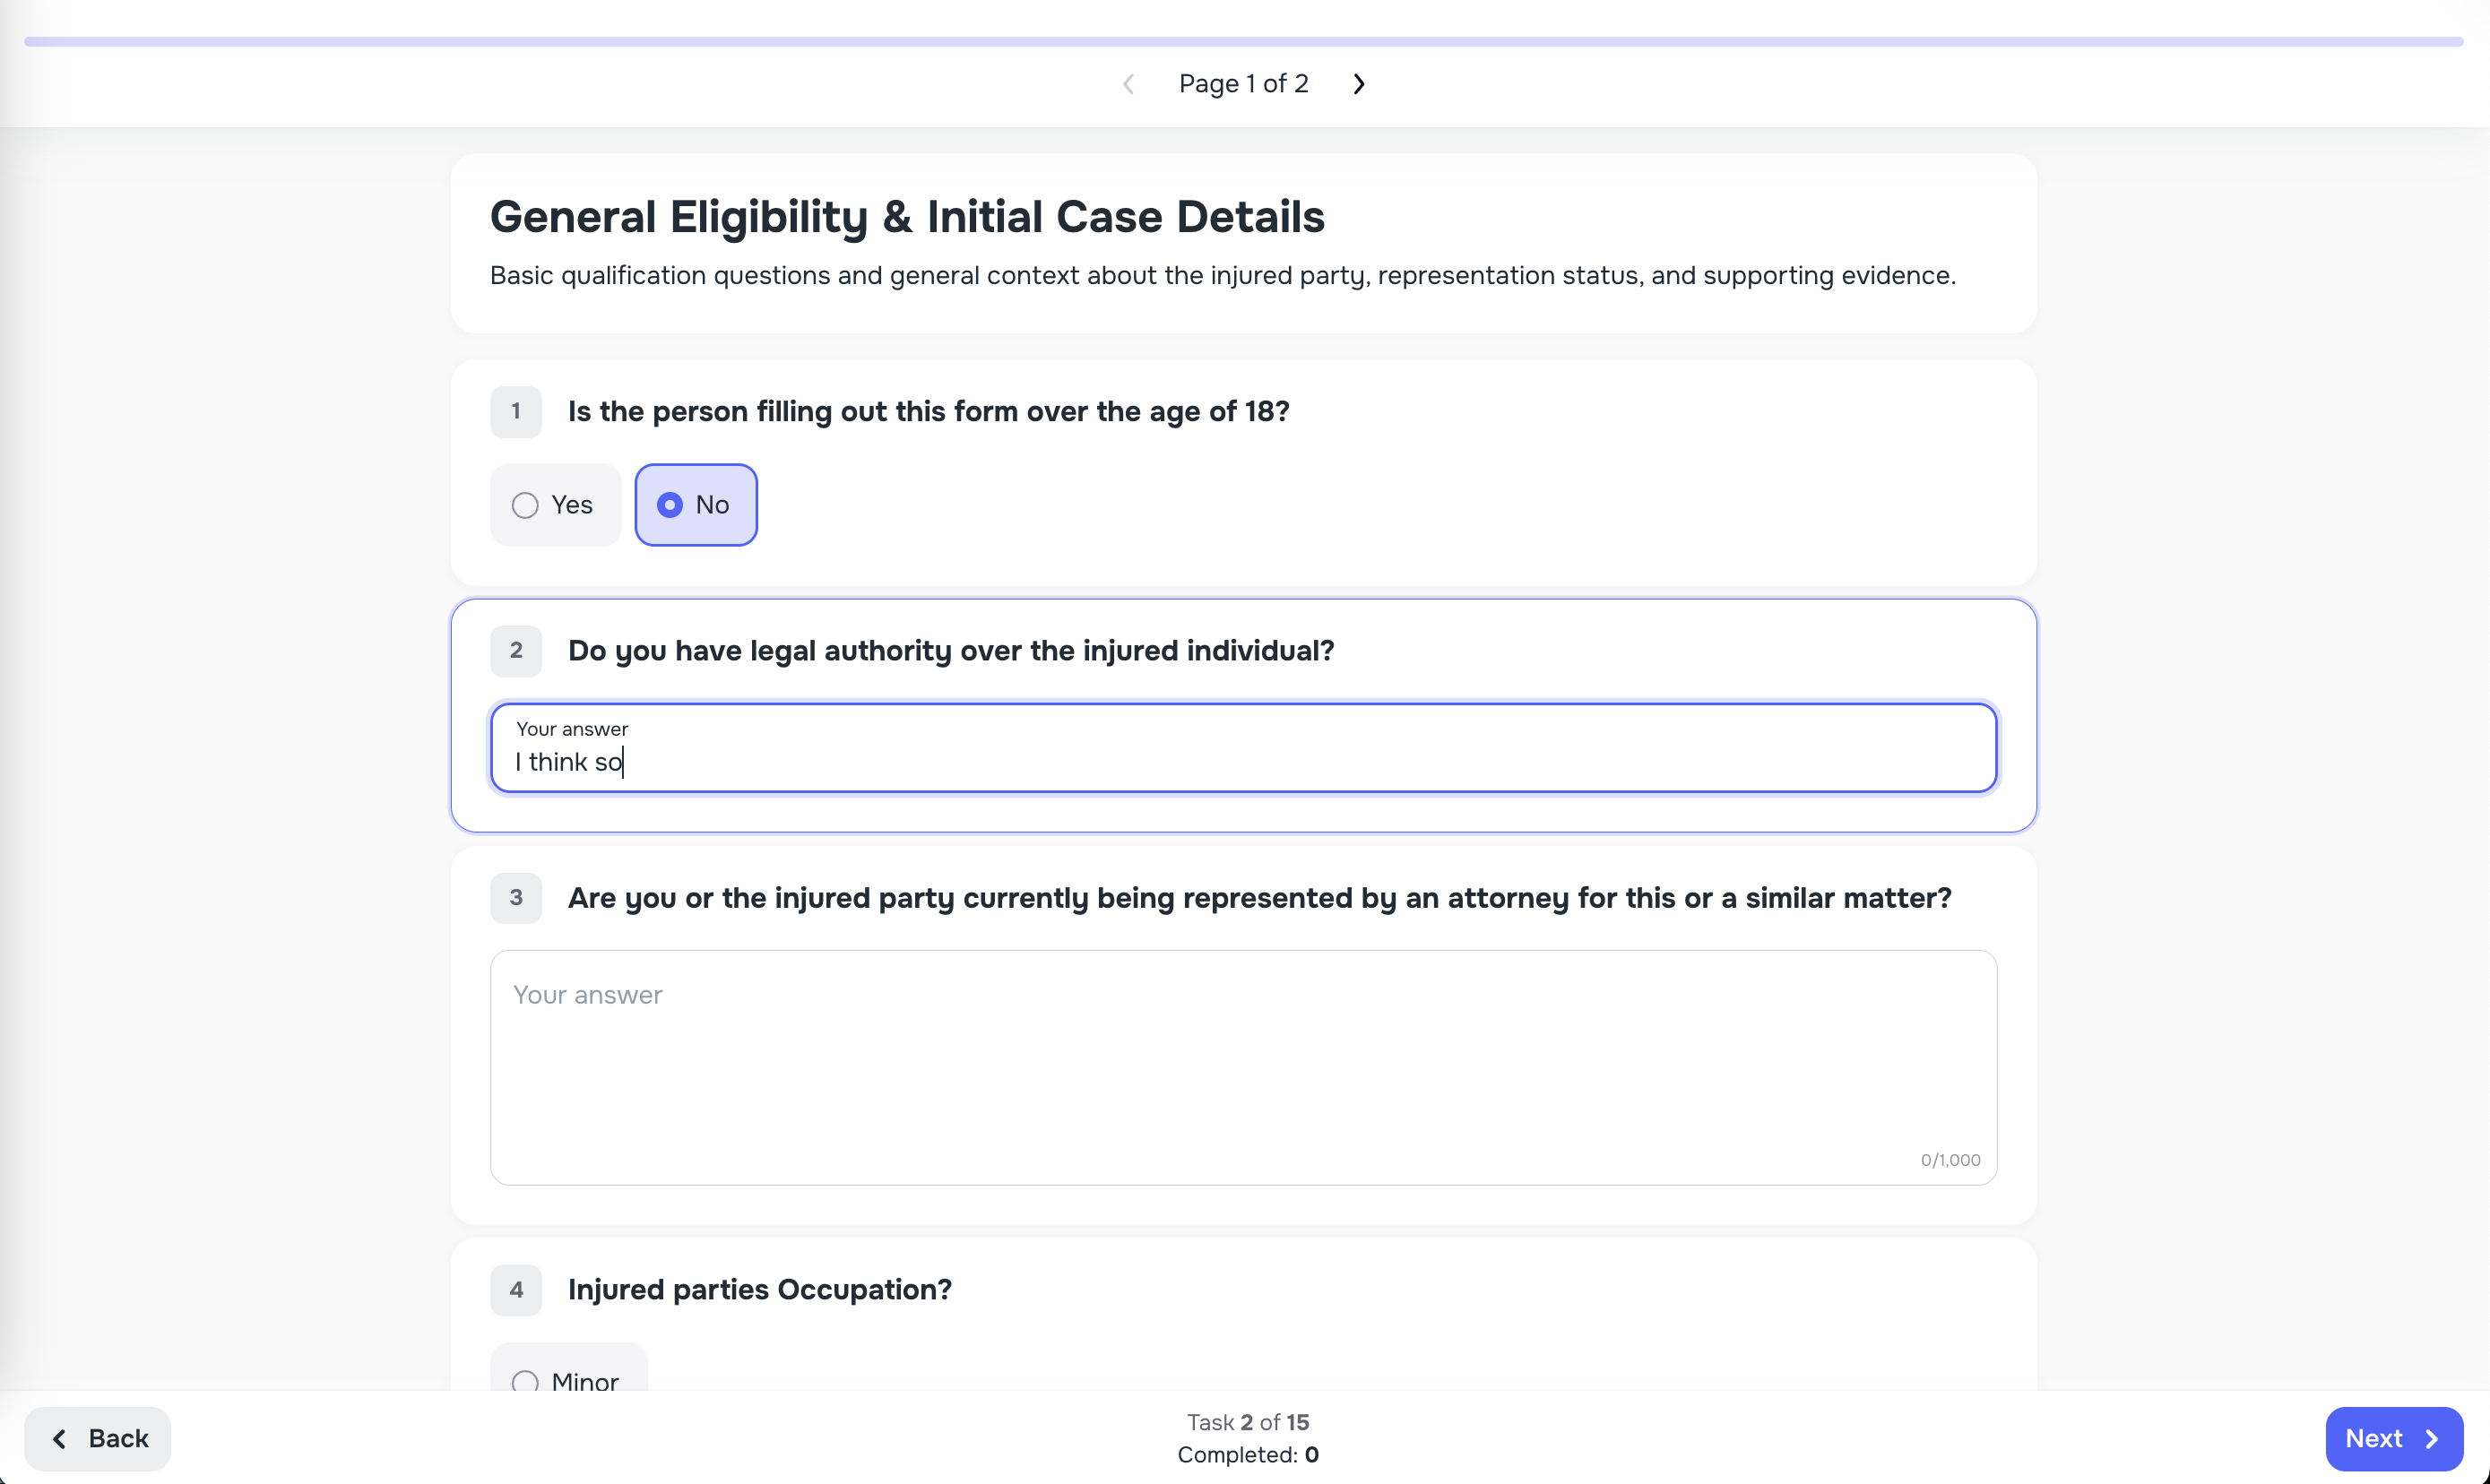
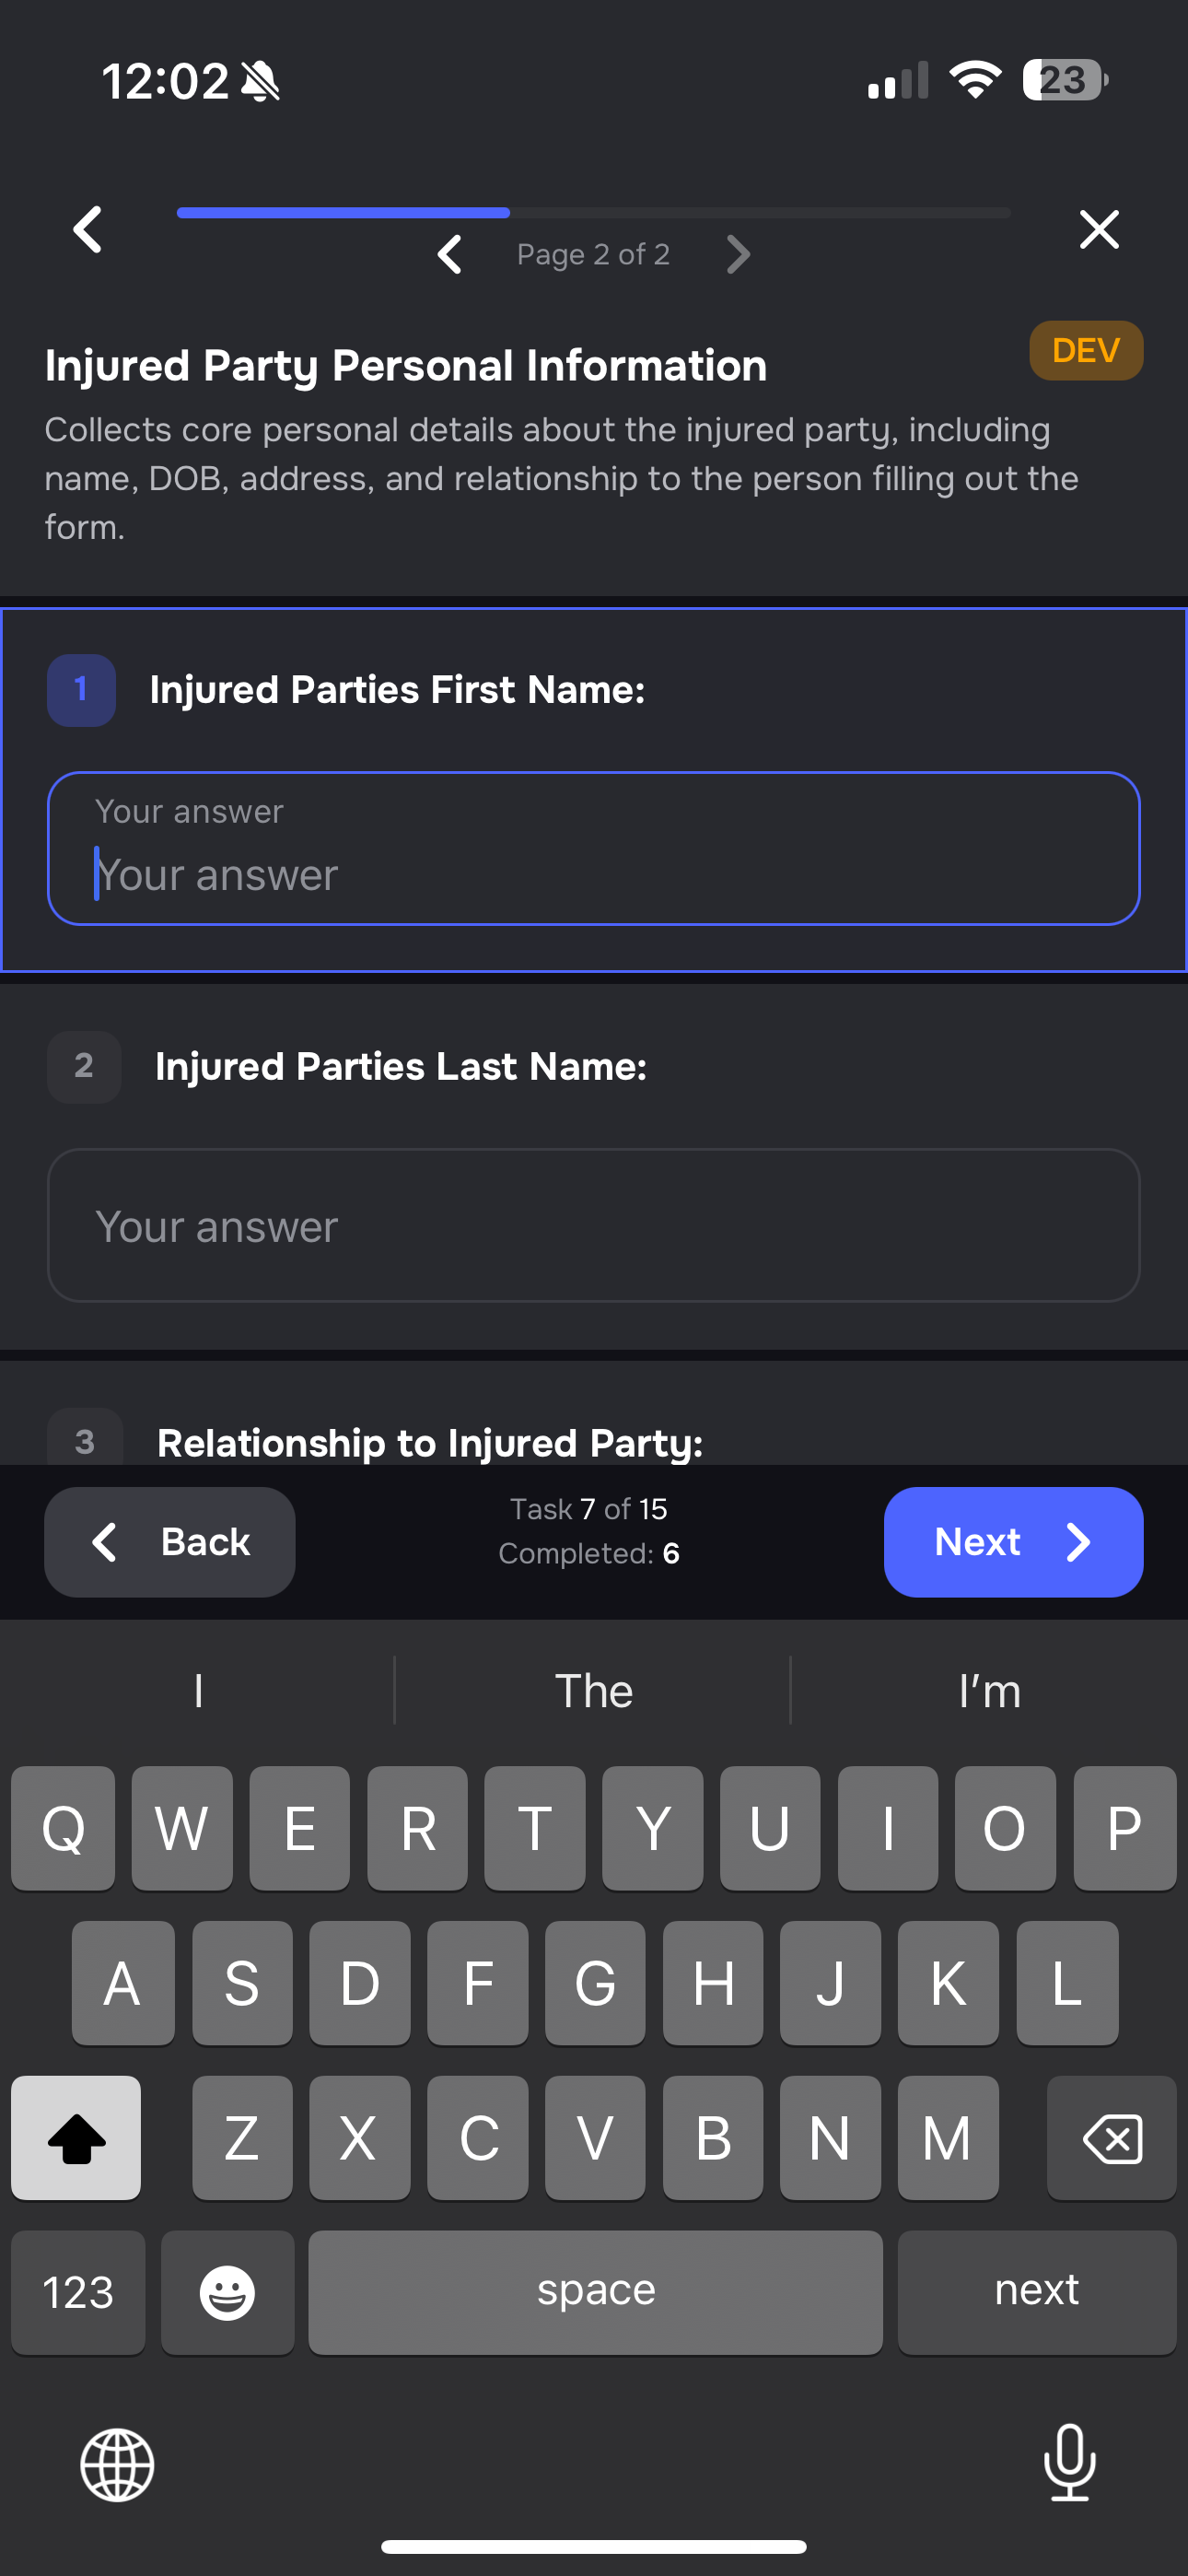
8. How Clients Complete Tasks (Web & Mobile)
Web Browser Experience
Clients see:
- A clear progress bar
- Next / Back buttons
- Auto-save
- Auto-focus
- Ability to return later
All responses auto-save instantly, so clients never lose progress.
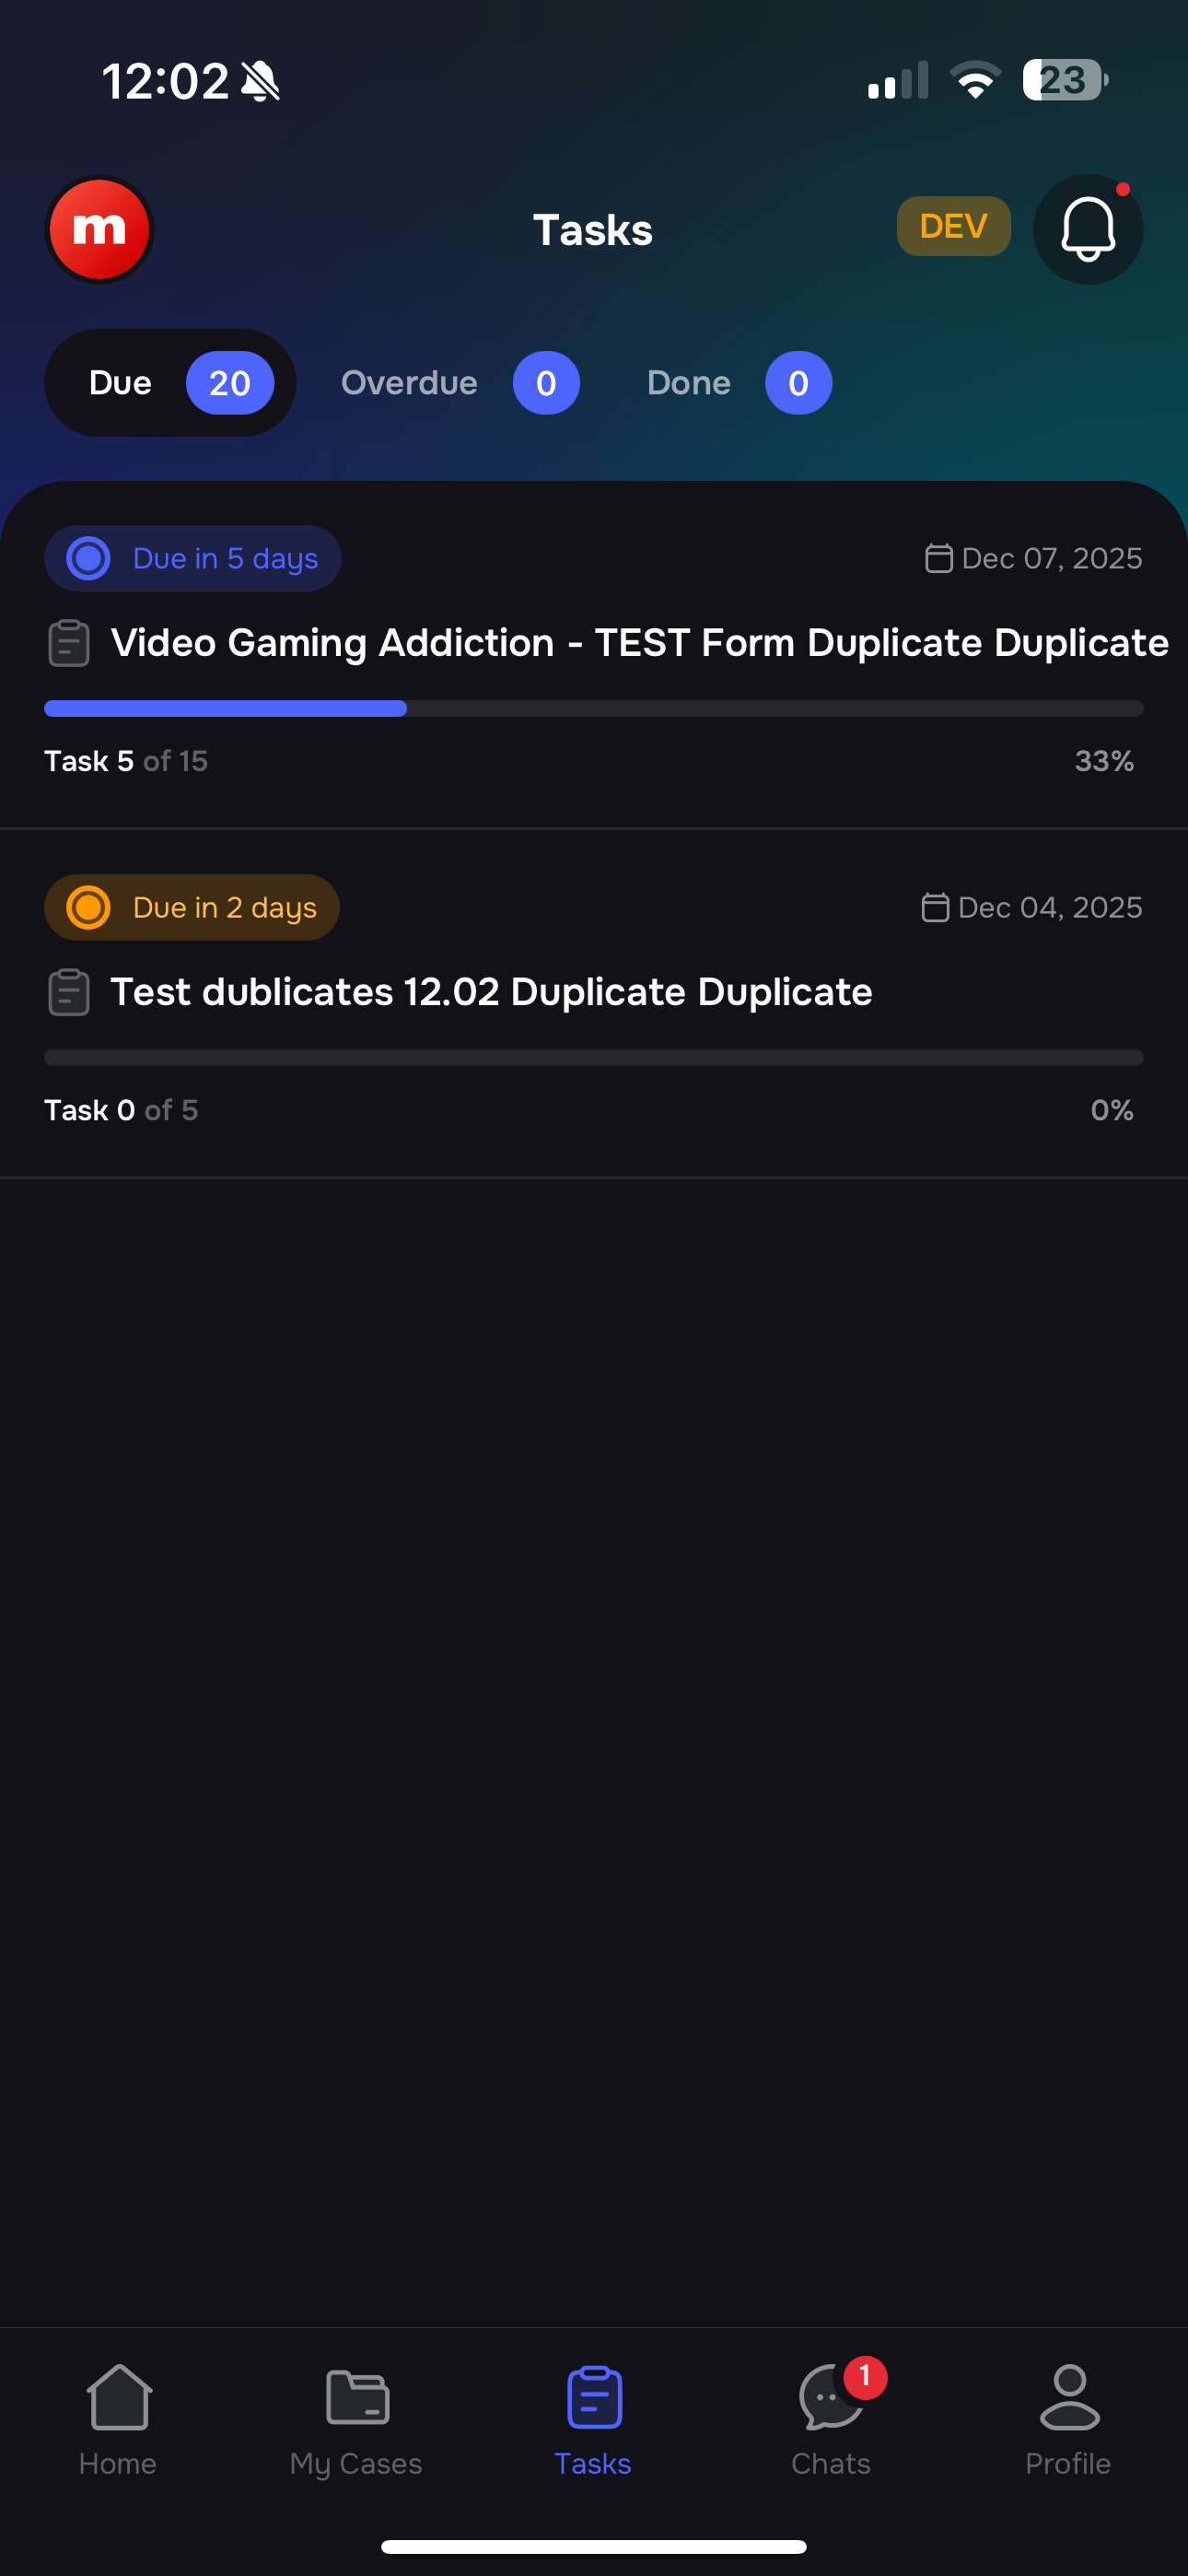
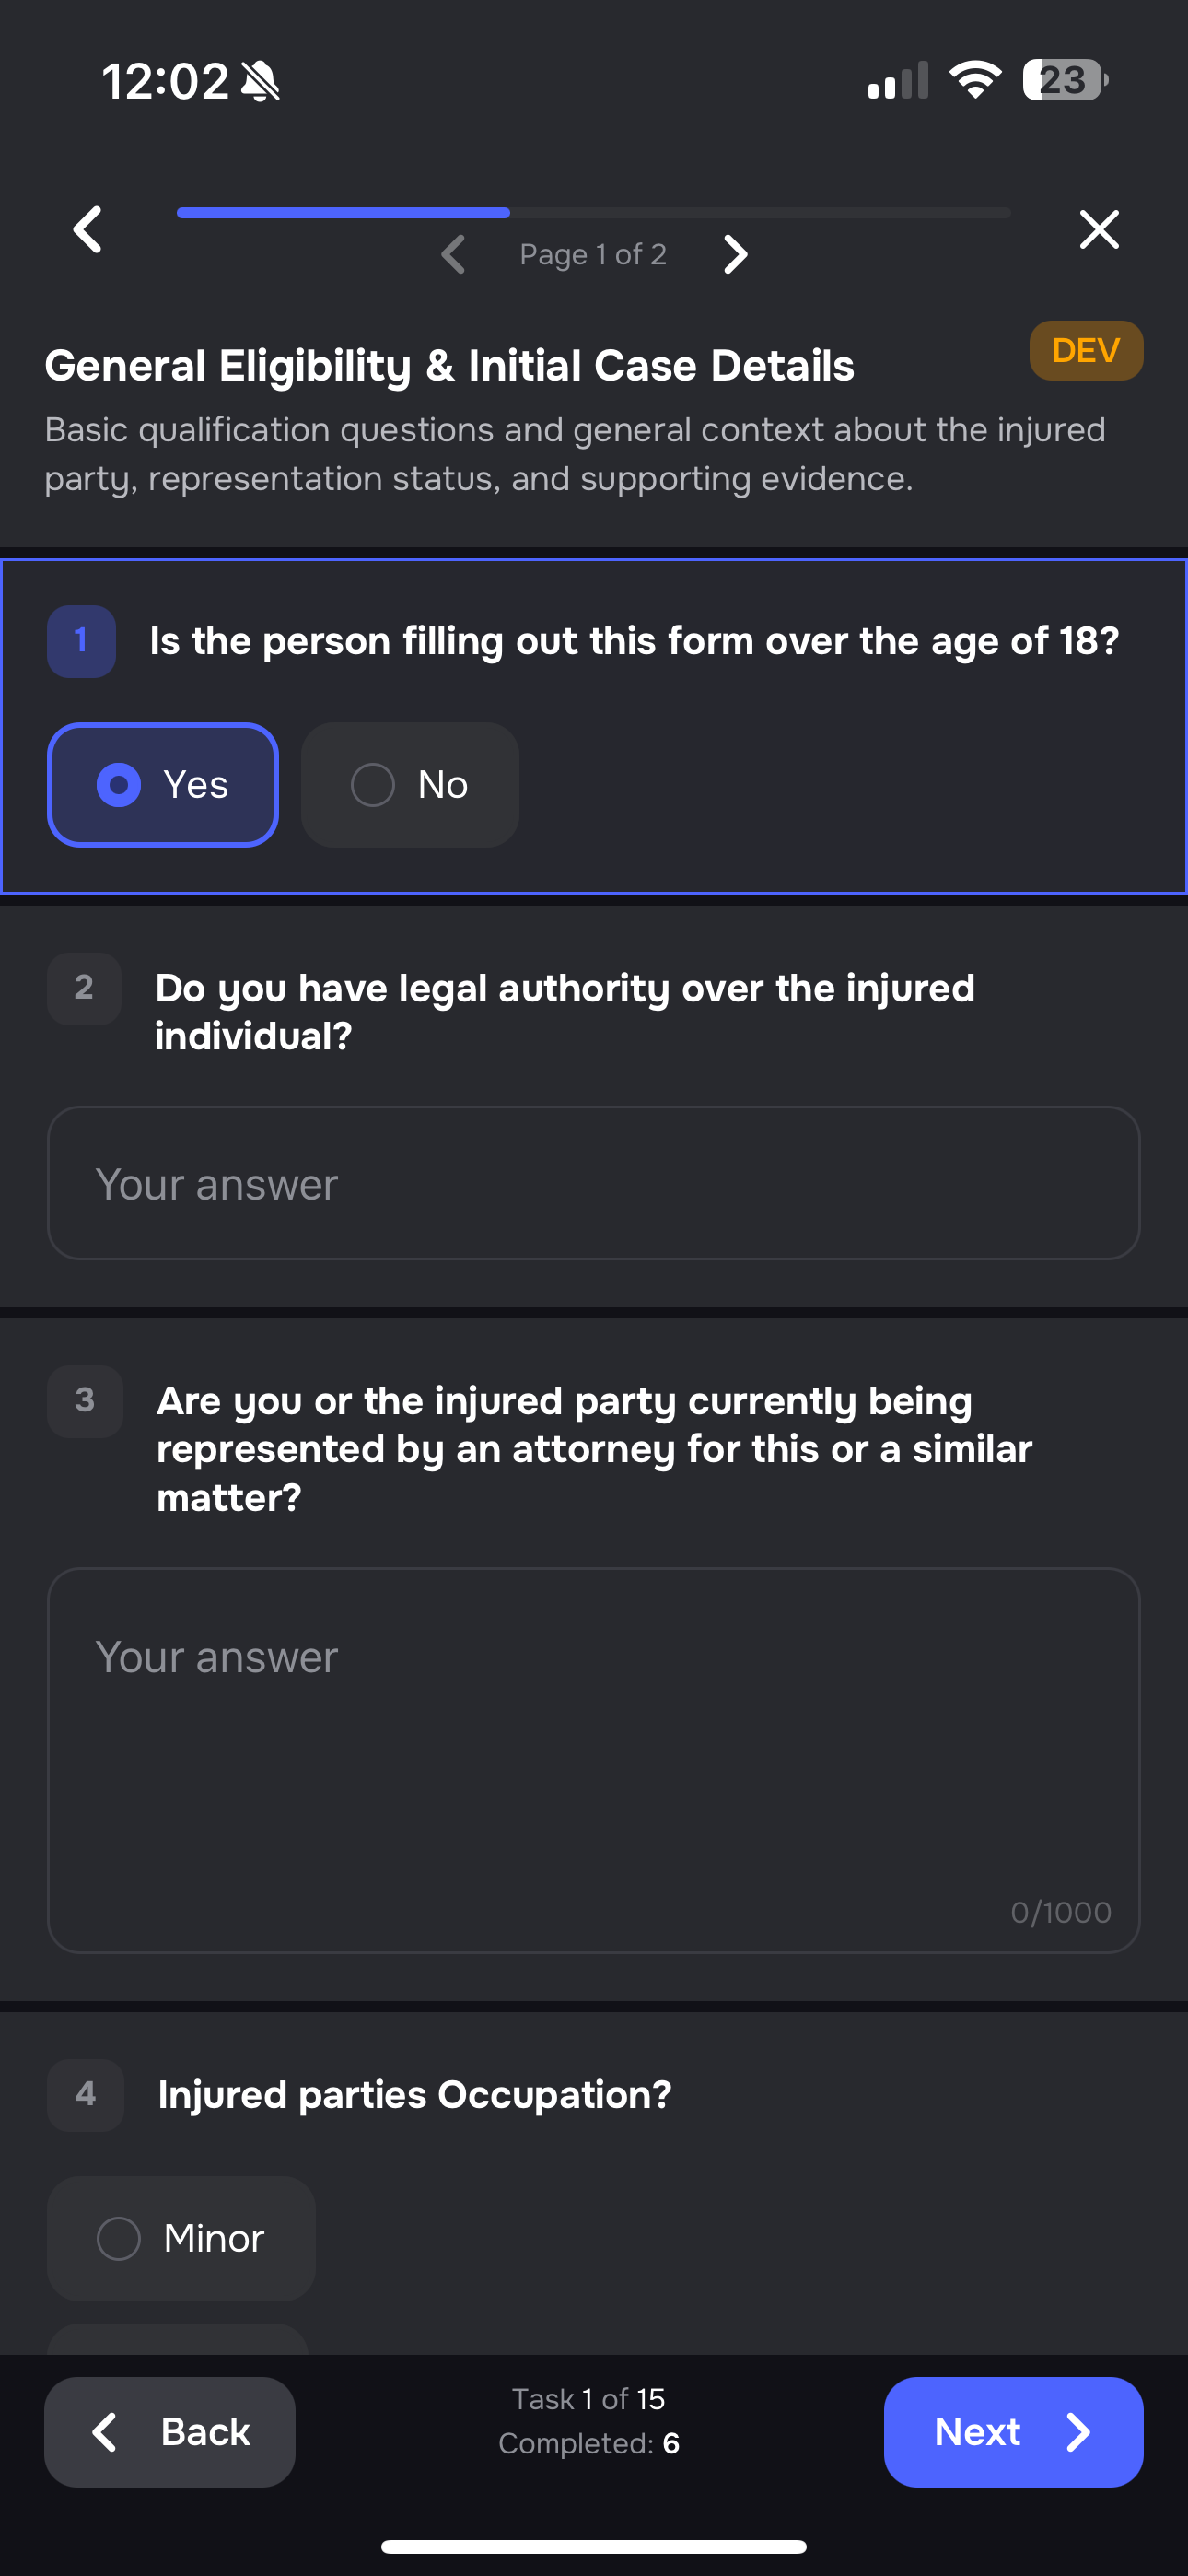
Mobile Client Portal App
Clients get:
- Task list
- Clean mobile interface
- Instant updates when tasks are completed
They can complete tasks directly inside the mobile app — no browser needed 😊
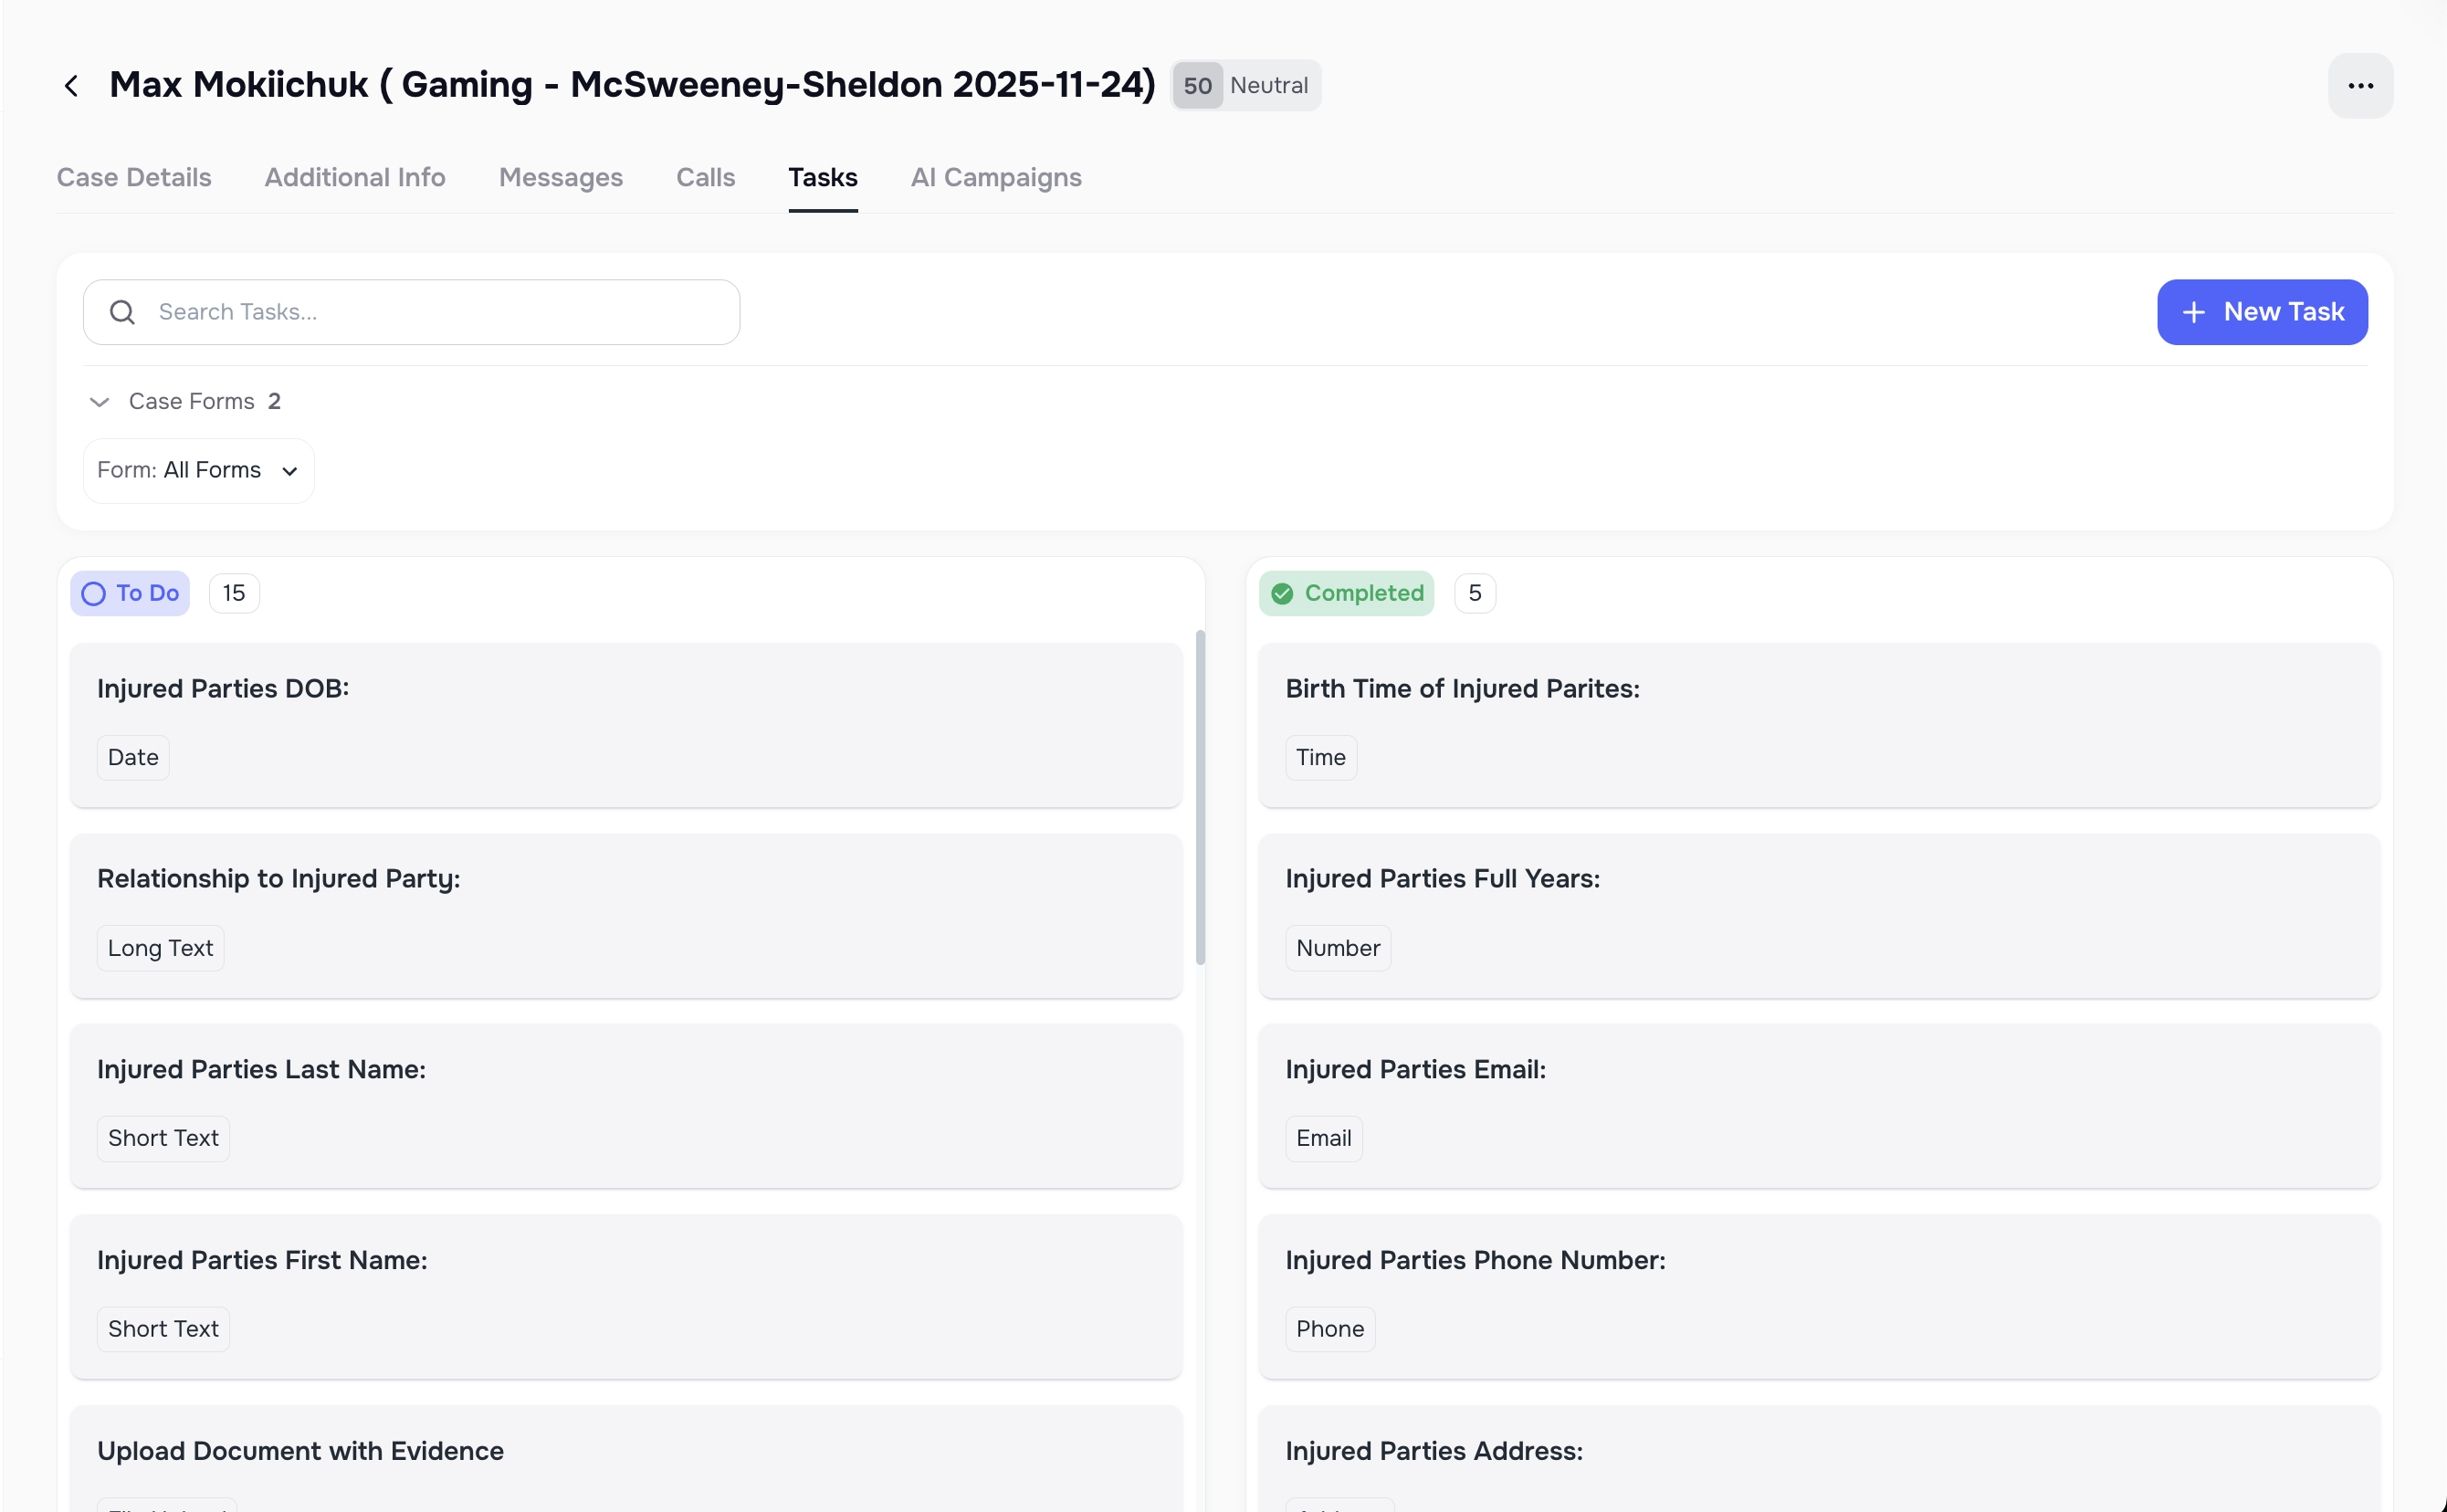
9. Smart Tasks Inside a Case
Each Case shows:
- Tasks from all forms linked to the client
- Standalone tasks
- Status indicators
- Filters to sort tasks easily
Form Tasks and standalone tasks appear together on a case page. You can filter them by Form.
Where Submitted Data Appears
After a client completes a task, your team can review the data in several places:
- The Case -> Tasks tab shows task status, completion time, and submitted answers.
- The Form view shows completion across all linked cases.
- The AI Campaign -> Tasks tab shows campaign-level task progress when the form was attached to a campaign.
- Mapped answers also appear on the connected Kayse custom field.
- If CRM mapping and CRM sync are configured, the same saved value can also be sent to the mapped CRM field.
File uploads remain attached to the task and case so your team can review them with the rest of the client's record.
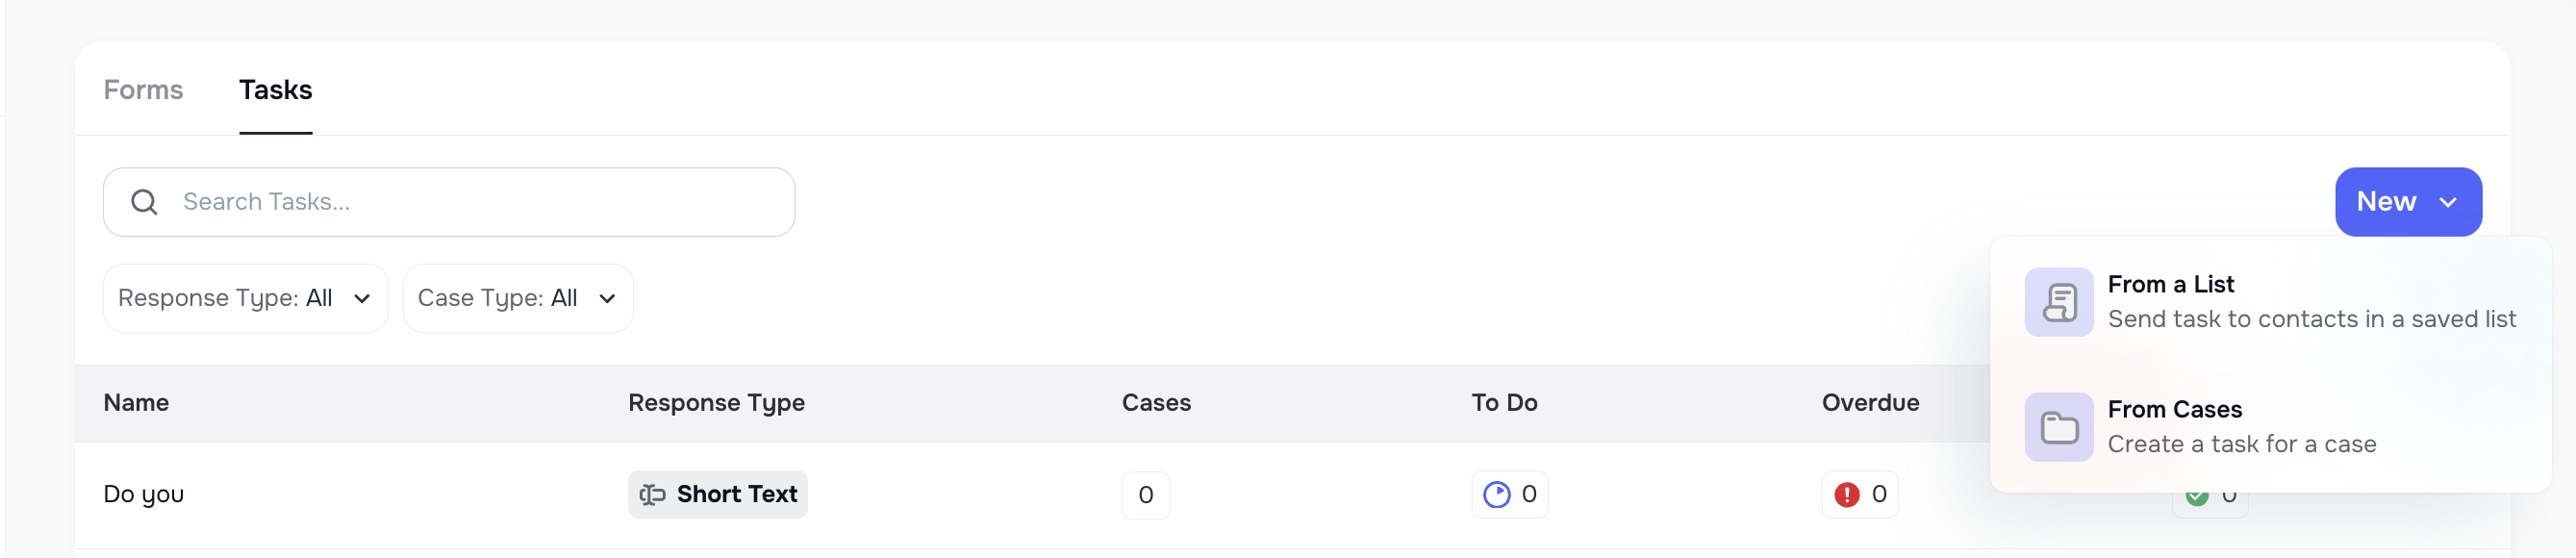
️ 10. Standalone Tasks (Without Forms)
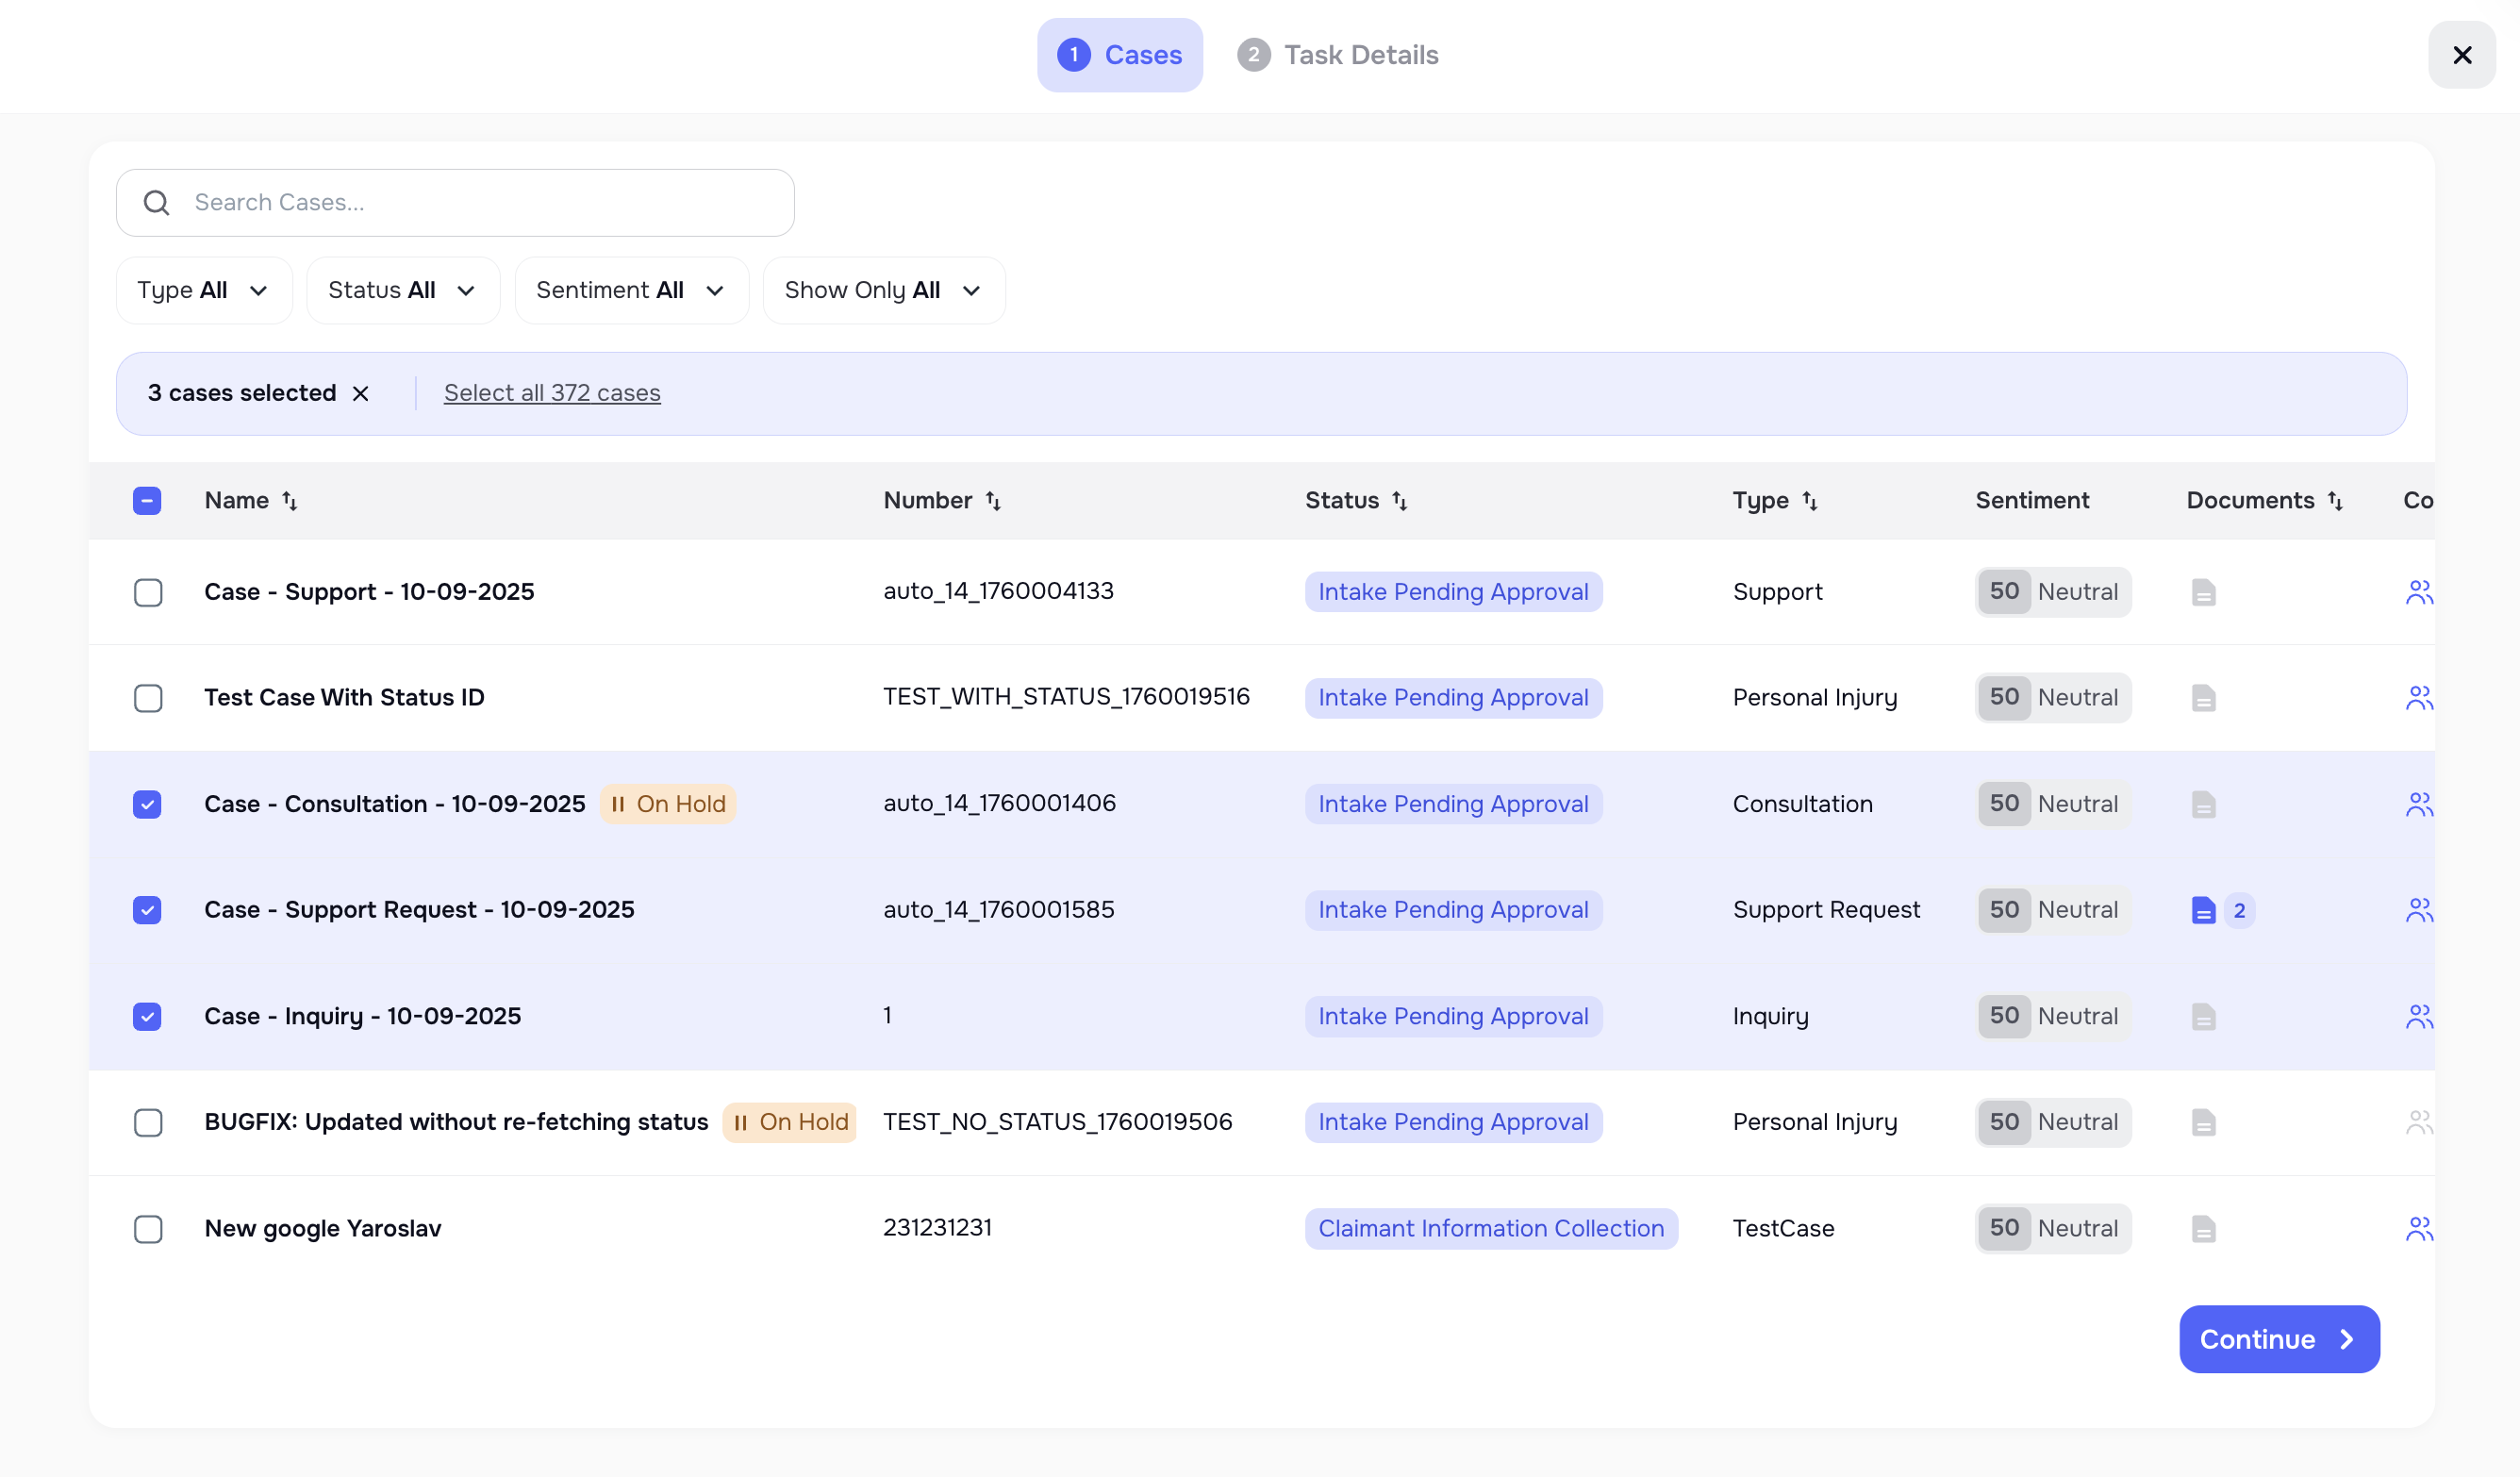
You can create tasks outside of forms:
- For one case
- For multiple cases at once
- From the Tasks page
Standalone tasks do not belong to a Form and cannot be grouped into pages. They appear directly inside the Case and behave like individual checklist items.
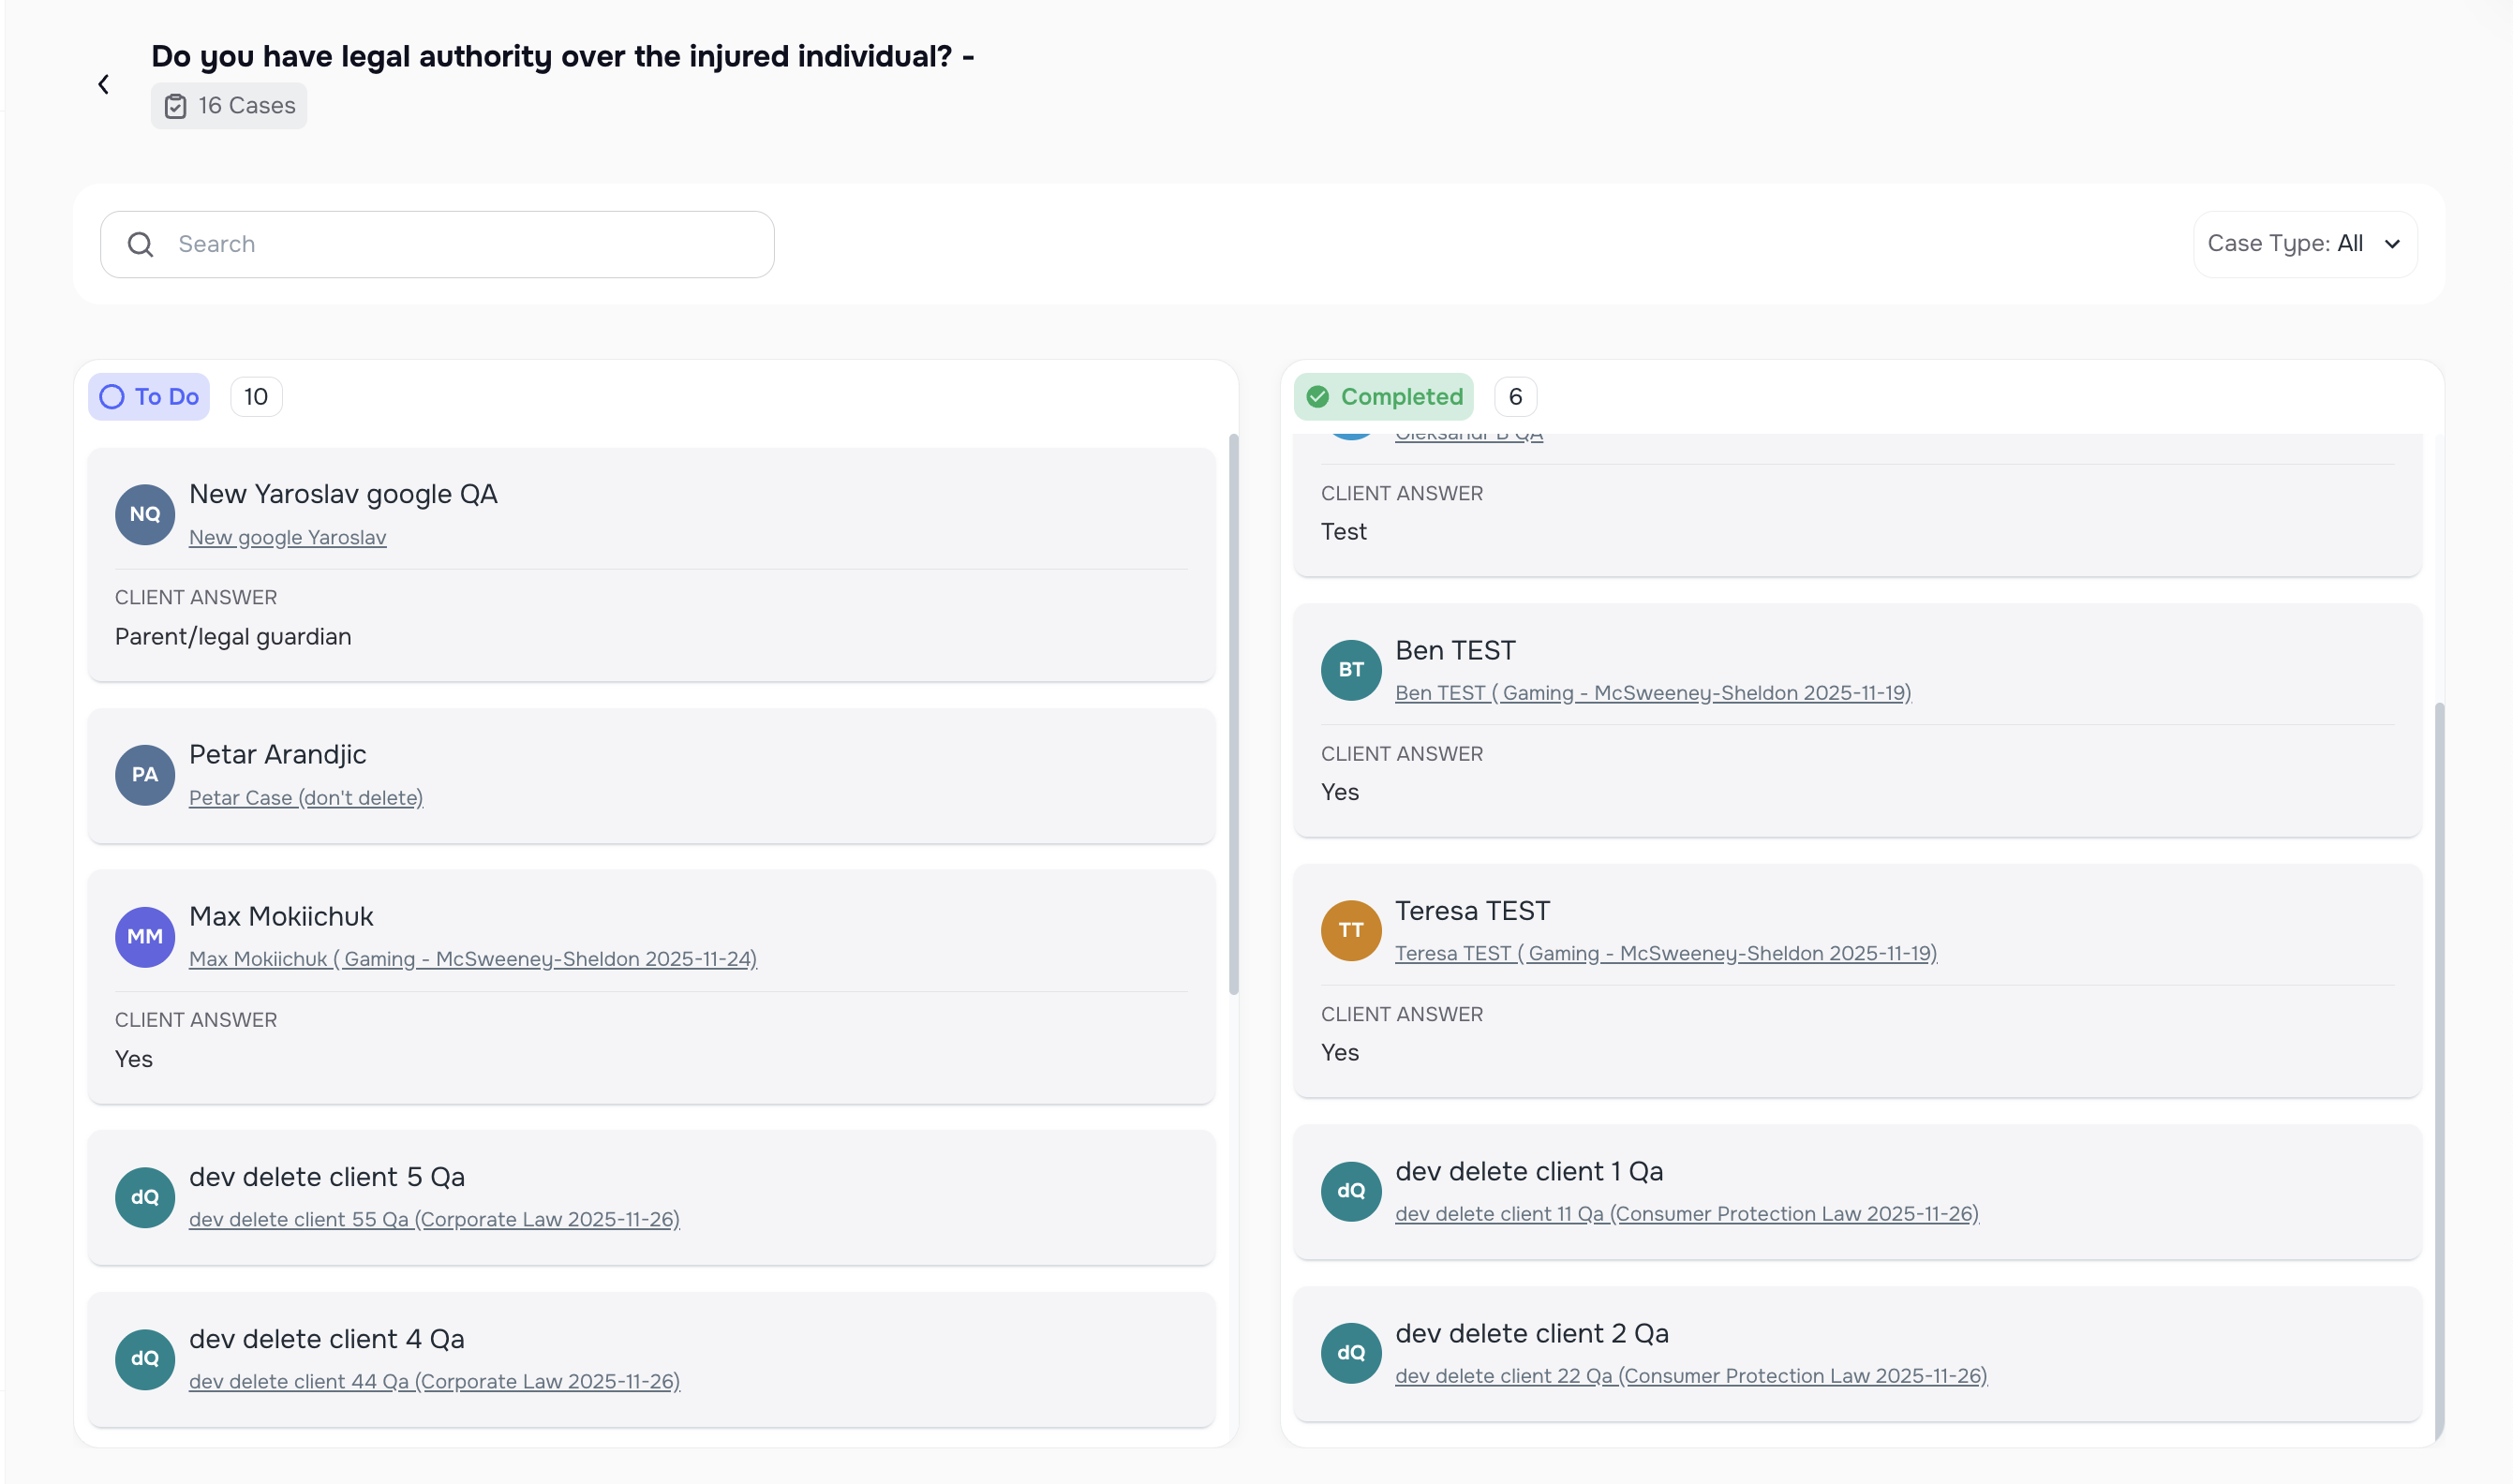
🗃️ 11. Kanban Board for Tasks and Cases
The Kanban board helps you quickly see:
- To-Do tasks
- Completed tasks
You can drag tasks to mark them as done — simple and fast 🙌
Kanban updates only the task status (To-Do or Completed). Task details, input type, and structure must be edited from the Form builder or Task Library.
⚠️ 12. Important Rules & Restrictions
To protect your data and avoid conflicts:
- You cannot edit tasks or pages if a form is in an active AI Campaign
- You can still change labels and descriptions that do not change the answer structure
- You can still edit:
- Form title
- Form description
- Page title
- Page description
- Task title
- Task description
- Use Copy Form to make new versions
- The Task Library prevents duplicates
- Tasks save automatically
- Completed tasks become read-only for clients to protect submitted information.
✔️ 13. Best Practices
- Use Copy Form before editing forms already used in campaigns
- Keep task names short and clear
- Use separate pages for big groups of tasks
- Use File Upload only when you need to request docs
- Use existing tasks to avoid duplicates.
- Break long Forms into multiple pages to help clients complete tasks faster and with fewer errors.
14. Troubleshooting
Why can’t I edit my form?
→ It’s part of an active AI Campaign.
Why do I see duplicates?
→ Check the Task Library for similar tasks.
Why can’t I send the form link?
→ All tasks may already be completed.
Why didn’t my client receive the form?
→ Check Notification settings and make sure the client has a valid phone number or email.
Why aren’t task stats updating?
→ The client may not have completed the final step.